Internal Flooring
27/08/15 17:11
Once the membrane was on the roof we decided, while waiting the three weeks for the windows, to further protect the whole roof with a tarpaulin so the inside wasn't damaged by water getting in.

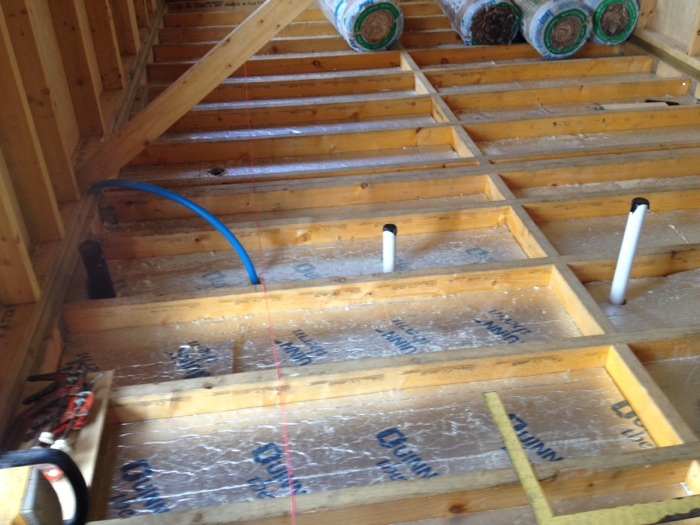
Once this was in place we started on the internal floor. Sealing the gaps between the joists. We installed a thin batten of wood around all sides of the joist openings at the bottom then used the left over 10mm ply, that would have been placed on the roof, cut and placed in each joist gap on top of the battens. We screwed each ply piece to the battens then sealed each ply piece with silicone to prevent wind and animal ingress.
Once this was done the foam insulation, 100mm, was cut and placed in each of the joist cavities. We then completed the insulation with 100mm of rock wool. On top of this we placed an airtight membrane and then sealed this with tape. Then we cut the ply to become the subfloor on top of which the final flooring would be fitted. As you can see above we also made sure the pop ups for water, drainage electricity and network came up through the floor in the correct places. The pipes going out through the floor were then neatly connected to the soakaway drainage pipe.
We again thought about the thickness of the ply sub floor. In the specs this was set out as 18mm. Simon suggested that we use slightly better quality ply as well as choosing something thicker at 22mm. Again this served to create a very flat and rigid floor.
In Skye, even more than on other builds the attention to detail to prevent wind infiltration to the inside makes a massive difference to the feel of the building once complete. All people who come to the Blackhouse and Hen House are amazed at their warmth and ease of keeping warm with very little energy. The lack of unplanned for draughts is also commented on frequently.