-
Summer 2015 May 20- 26
Groundworks
The groundworks began May 20th. We had marked out route of road. Sean the guy doing the road in did a much better job with the route than we had marked. He skilfully routed it so that it cannot easily be seen from either the Hen House or our house. A track in, although more than 90m, would allow the easy dropping of of all building supplies this has saved us so much extra work. Despite our initial reluctance we listened to our joiners advice on this. He was right.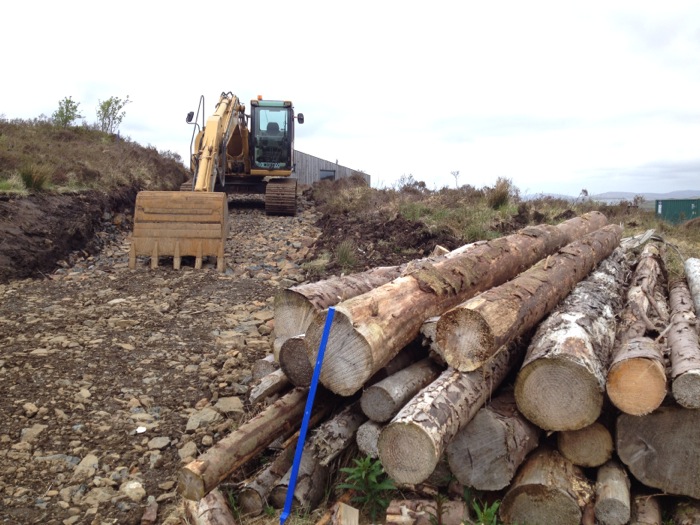
-
Summer 2015 29th May
Marking Out
The plot was measured, marked out and sited carefully with respect to the Hen House and topography. Once marked Sean dug the trenches for the piers within a couple of hours. The 15 ton digger can get through lots of work quickly.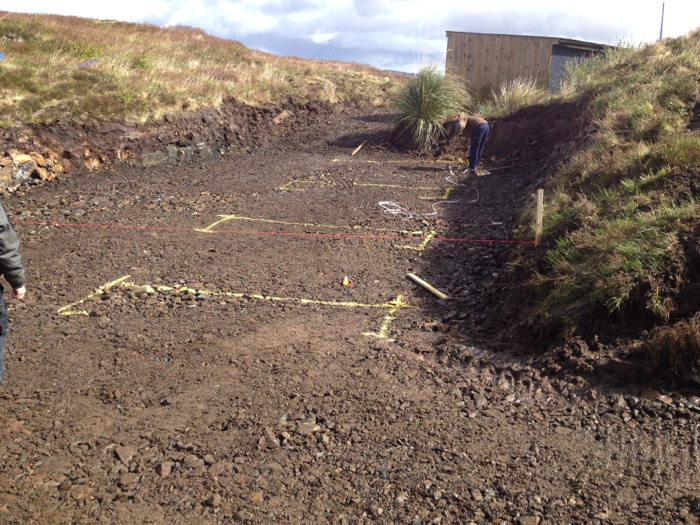
-
Summer 2015 May 29th
Trenches
Trenches Dug.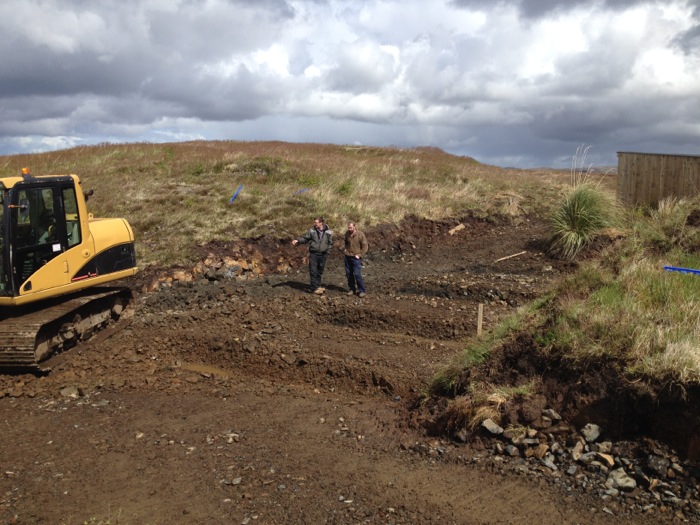
-
Summer 2015 5th June
Ballast, Blocks, Steel
The ballast for concrete, the steel mesh for the foundations and the steel bar for reinforcing the piers was delivered by Caley Timber right to the site with the forklift truck mounted on the back of their delivery lorry.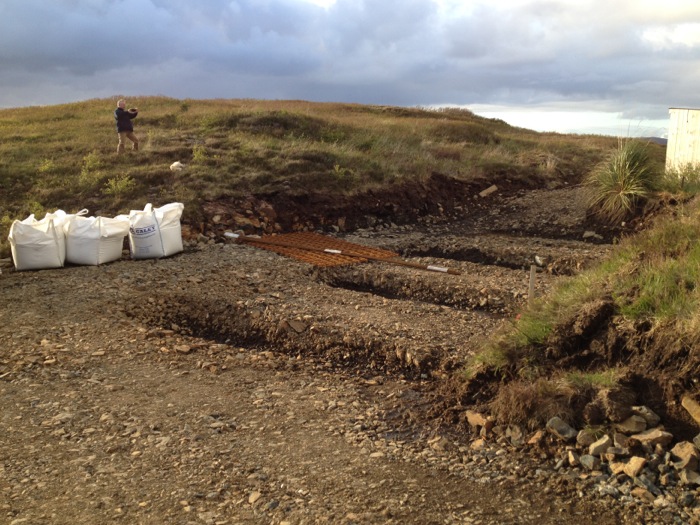
-
Summer 2015 15th June
Measuring Pier Positions
Marking out the centre of each pier and setting the levels across the trenches ready for the first pour of concrete.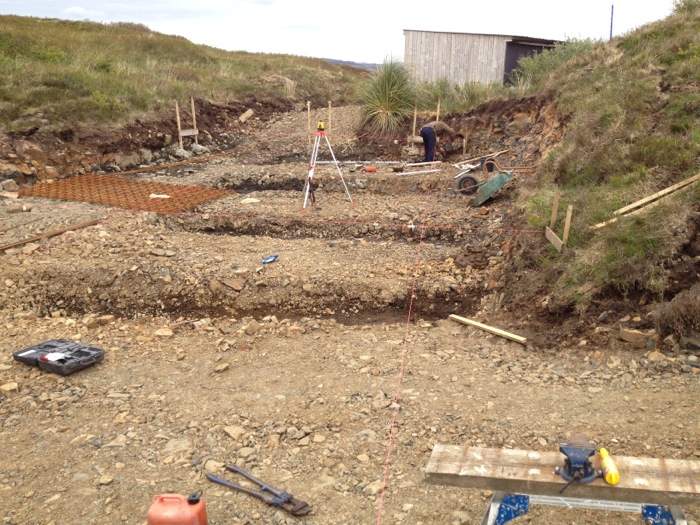
-
Summer 2015 16th - 19th June
Steel Work
Cutting the steel bar to length and bending it with heat to create the central reinforced cages for the middle of each pier.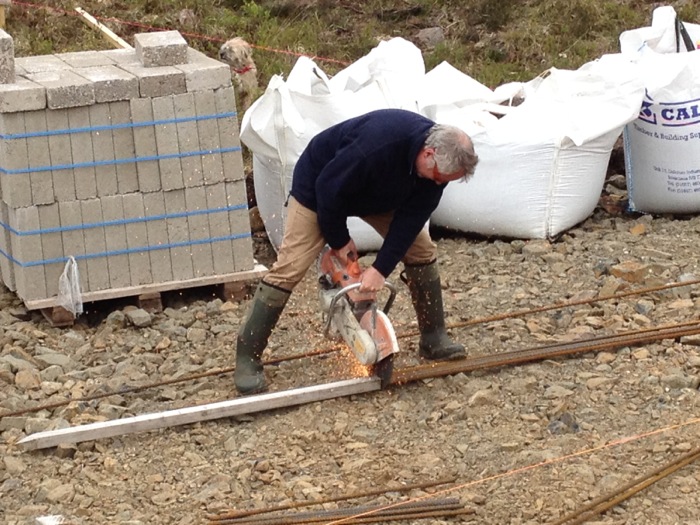
-
Summer 2015 29th June
Foundation Pour
Concrete lorry arrived to mix exact quantity of C30 mix required for the trenches. Sean with dumper and Digger on site to transport then bucket into trenches the concrete. Then placing of reinforcing mesh at 100mm level into concrete before placing central reinforced cage over centre point of each pier.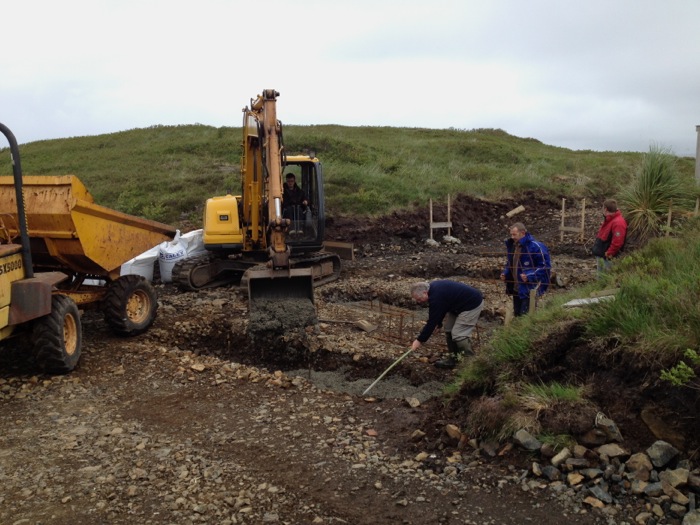
-
Summer 2015 29th July
Concrete Platform for each pier
Each Pier emerging from concrete trench foundation.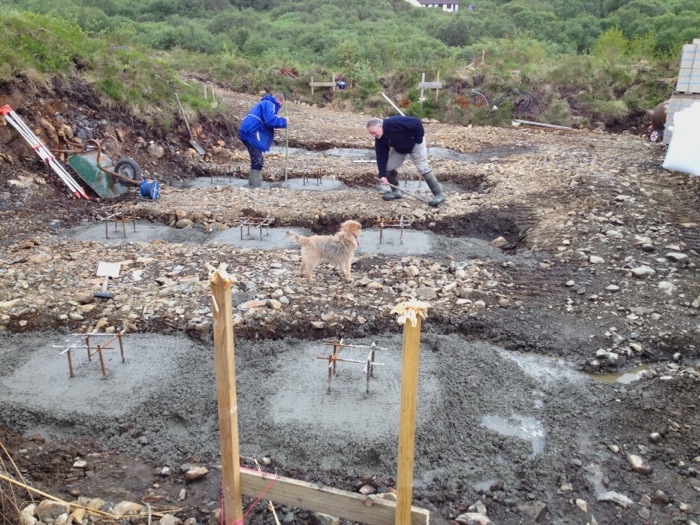
-
Summer 2015 1st - 2nd July
Block Piers
Building up each clockwork pier beginning with shorts at back of building and levelling each pier from the shortest.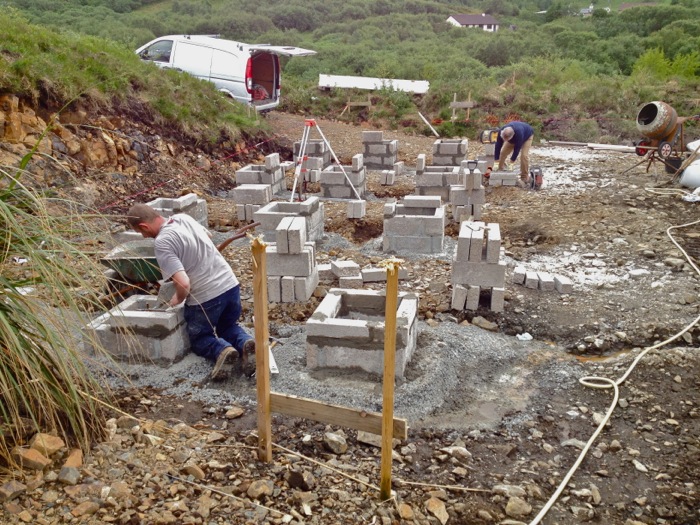
-
Summer 2015 July 3rd-4th
Blocks Fill
Mixing and filling each pier with concrete within block wall and over each steel reinforced cage.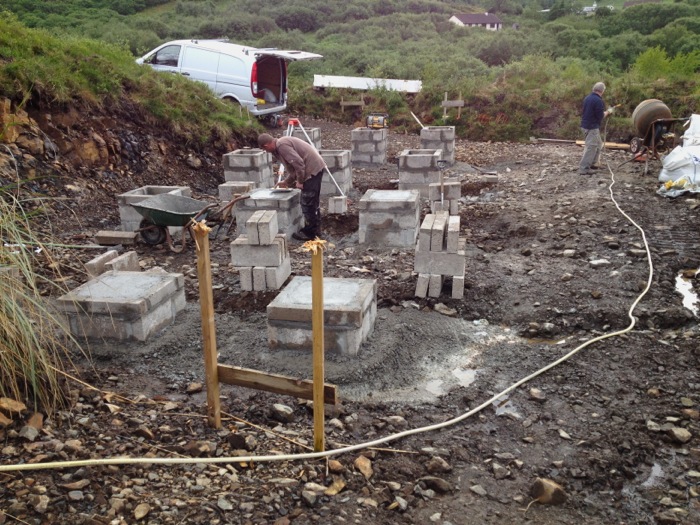
-
11/02/1979 12:00
Brackets to hold wooden beams
Concrete allowed to dry before measuring and levelling of each metal bracket that will hold the wooden beams form which floor will be built around.
-
Summer 2015 July 13th-15th
Infill around Piers
Sean was back on site with digger to break rock and use to infill to the top of the piers. To then level site after installation of drain and other popups.
-
Summer 2015 July 16th
All of the work so far buried
Once all of our hard work was buried I finished pop ups while Simon was away. We could then begin on the wooden beams/rails.
-
Summer 2015 July 23rd - 26th
Wooden beams/rails
Once Simon had returned we began on notching each engineered wooden beam to fit against each other to be bolted to each steel bracket on top of each pier.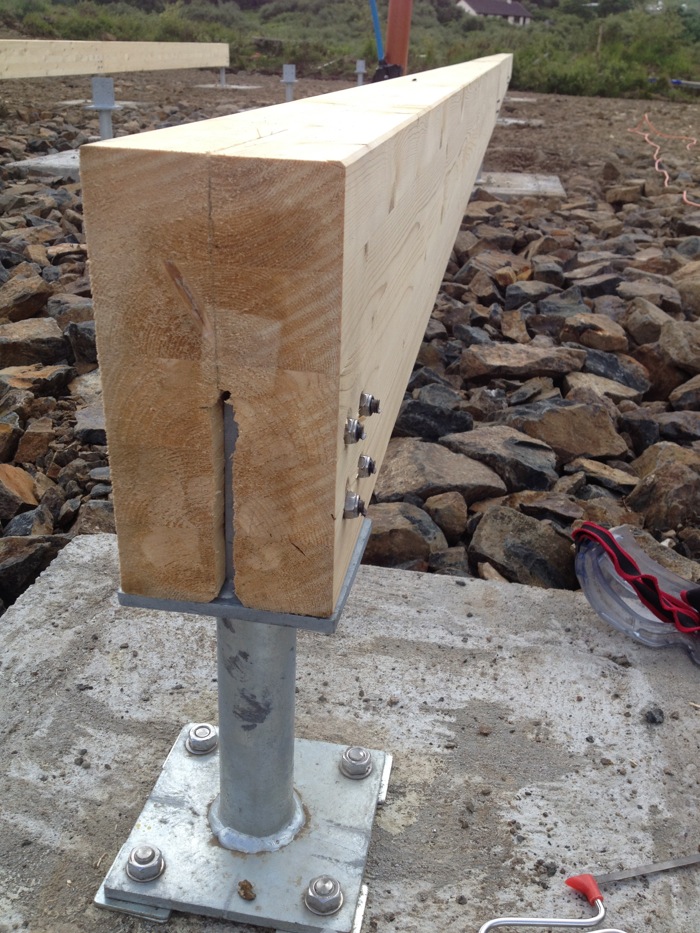
-
Summer 2015 July 30th
Floor & Joists
Once wooden rails were notched and bolted the joists were cut and hung on joist hangers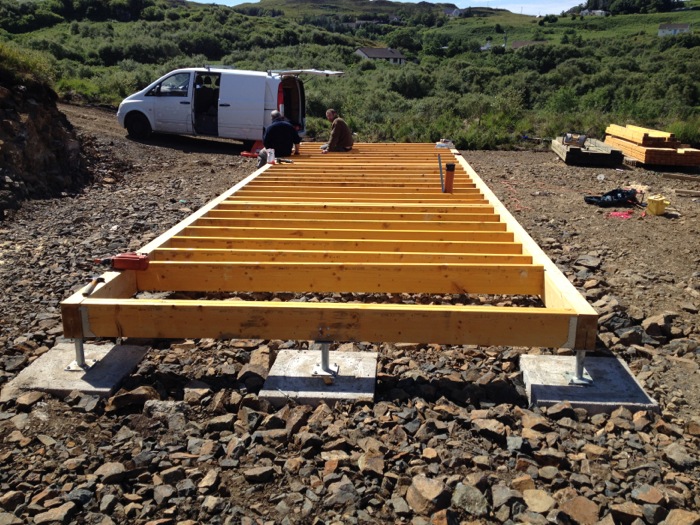
-
Summer 2015 August 3rd-6th
The Wall frames
After all our work had been buried, like all builds once the patient work in the ground has been done above ground work speeds up. We were also joined by Bekah to help construct and heave frames into place. So three of us on site.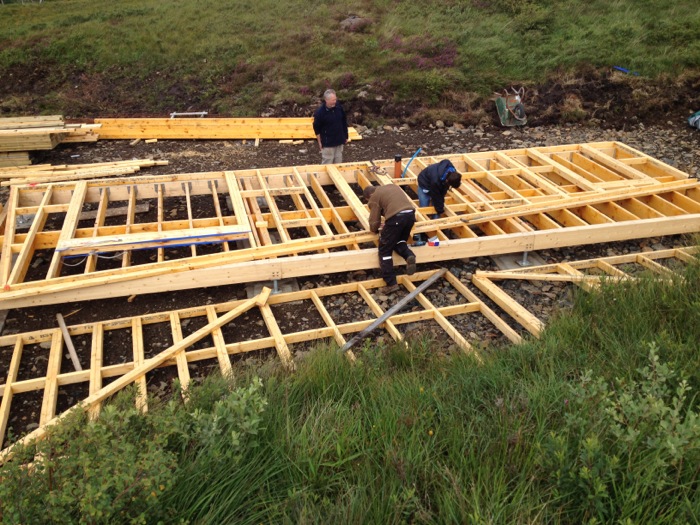
-
Summer 2015 August 6th
Frames going up
Long wall frames were built using the floor as a platform and former.
-
Summer 2015 August 7th -8th
Walls standing
Once constructed long wall frames were cut in two to allow us to lift them into place. The work was quick, less than a week to build frames and erect all four walls.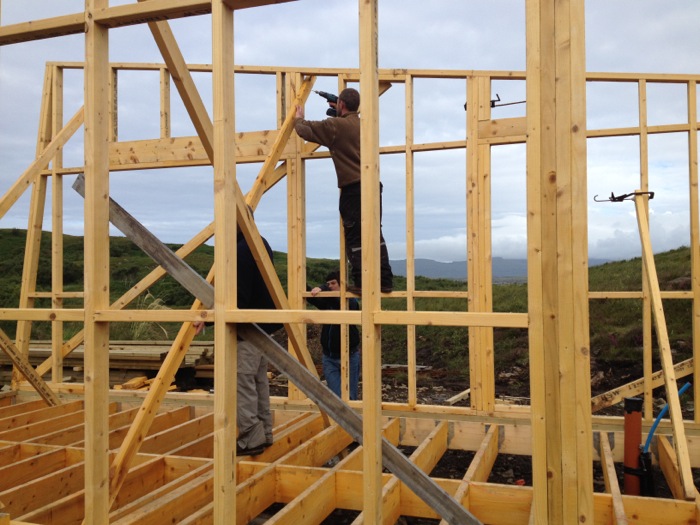
-
Summer 2015 August 14th
Sheathing
Bekah was with us for eleven days in that time all frames had been built, erected, sheathed and roof joists in place.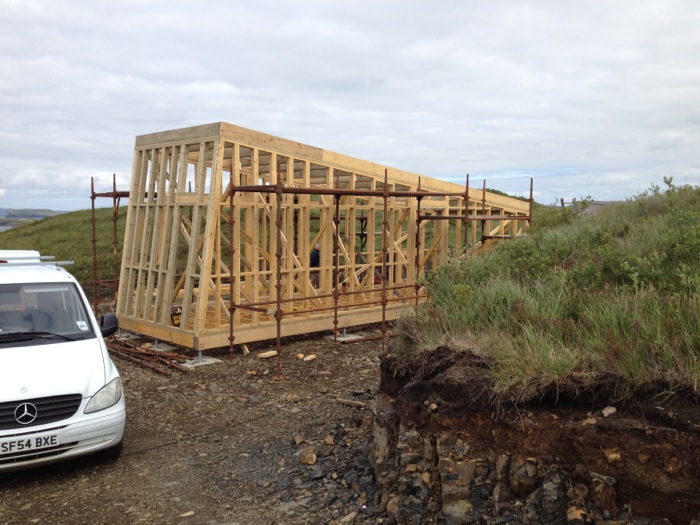
-
Summer 2015 August 15th
Ply Sheathing
By mid day on 15th August we had a plywood sheathed box.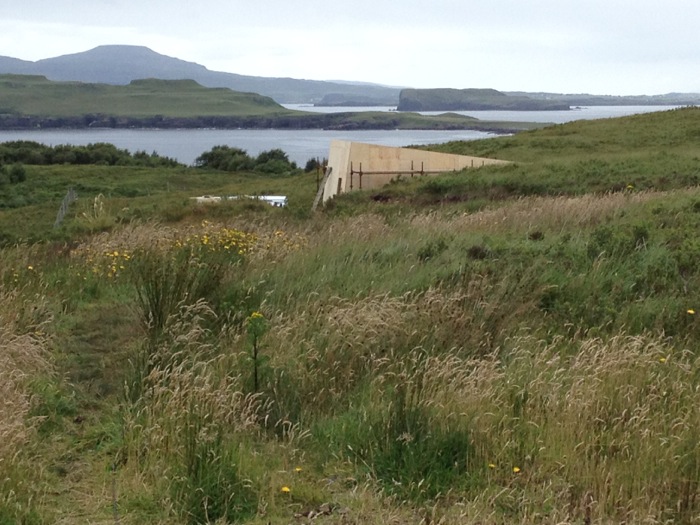
-
Summer 2015 August 17th - 20th
Roof ply, Membrane
Roof completed with 18mm ply. Then building wrapped in breather membrane.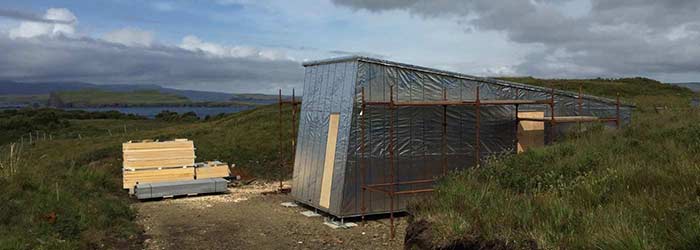
-
Summer 2015 August 25th - 28th
Internal floor
The next few days were taken up by sealing the gaps between the joists with battens and plywood on top. Then sealed with silicon before the foam insulation.
-
Summer 2015 Sept 2nd -25th
Ordering on time
Part of project managing is ordering things on time. I cocked up with the windows from Nordan. I forgot that they have a three week factory shutdown in July. So they won’t be with us before 25th September. Once we completed the floor we boarded up the windows and made building watertight and wind proof. I am making sure all materials, external cladding, flashings, stainless screws, are all ready to go once the windows arrive. Hopefully building will be wind and watertight by last week of October.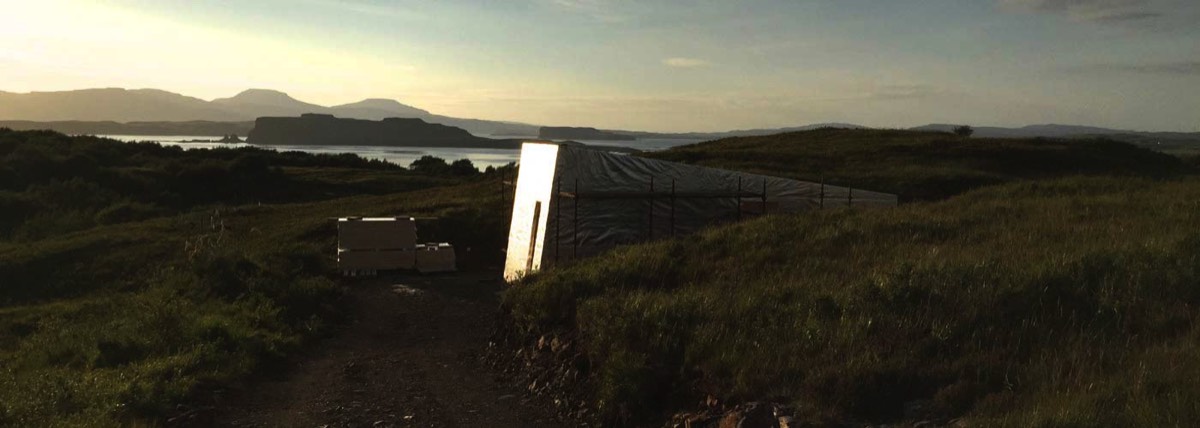
-
Autumn 2015 Sept 23rd
Windows Arrived
The Windows from Nordan have arrived on Skye a couple of days earlier than expected. John, Caley Timbers incredibly helpful driver, has said he will deliver them Tuesday morning, 29th Sept, just before he goes on holiday. This is great news as it will allow the final work, windows, flashings, external sheathing, to be completed before the likely November storms scud in across the Atlantic.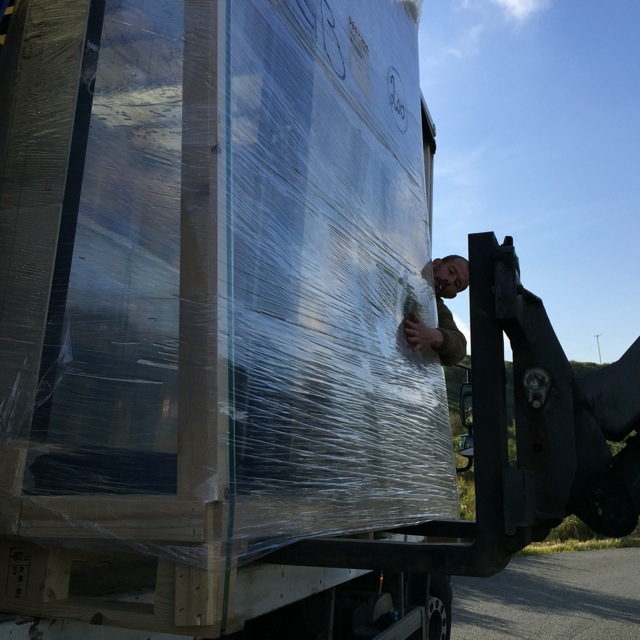
-
30/09/2015 Sept 30th - Oct 2nd
Windows in Place
The large window was very heavy, around 150kg, so we had to lift it carefully, by stages, on blocks of wood before finally lifting it the remaining 100mm into the space built for the window. Simon needed a hand with the single door the next morning before I left for work at midday.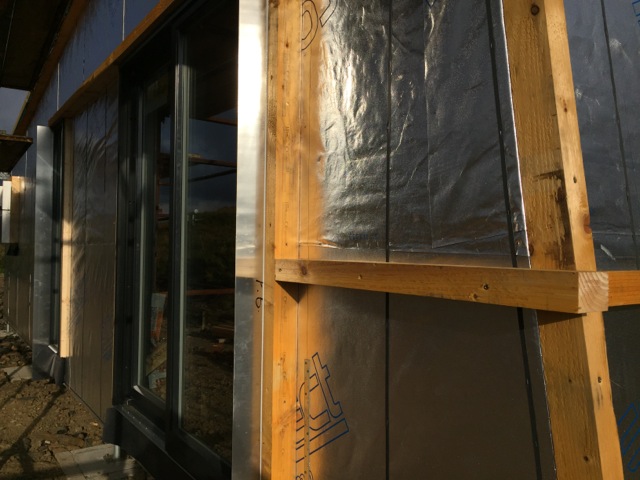
By the end of the next day, Thursday they were all in and Simon had started on the horizontal rails that will be the fixing points for the external skin of the building. -
05/10/2015 Oct 5th -9th
Windows, Flashings, Insulation, Sheathing
The week was taken up by cutting the Quintherm 100mm insulation and fitting it tightly between the horizontal rails. Taping it so water couldn’t get behind. The windows had to be carefully placed in order to be at the right depth in frame opening so that the custom aluminium flashings all fitted correctly. This took careful measurement and preparation. The flashings were then fixed around all windows in prep for the beginning of the sheathing. We were able to begin the wall sheathing on Friday the 9th and had seven boards in place by 5.30pm. The combination of the aluminium with the gray Marley looks very good.
-
09/10/2015 Oct 9th
External Finish Begins
By the afternoon of the 9th of October all was completed, insulation, taping, flashings, ready to begin attaching lower wall sheathing.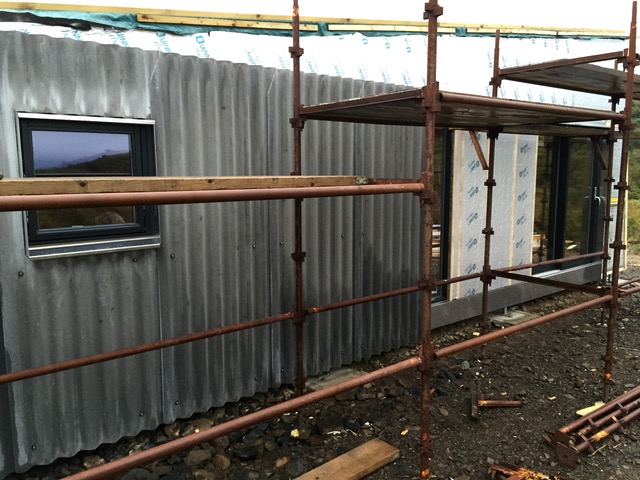
-
12/10/2015 Oct 12th
Marley External Sheathing (Walls)
We wanted to get on quickly to get the Marley on the walls and roof before the beginning of the winter storms. I was having to travel to work this week which was annoying as the weather was set to be good all week. The Marley Eternit profile 6 sheets are too heavy for one person to manage. So we both did all we could until I had to leave for work. We manage to complete both long walls this left the front and roof to complete.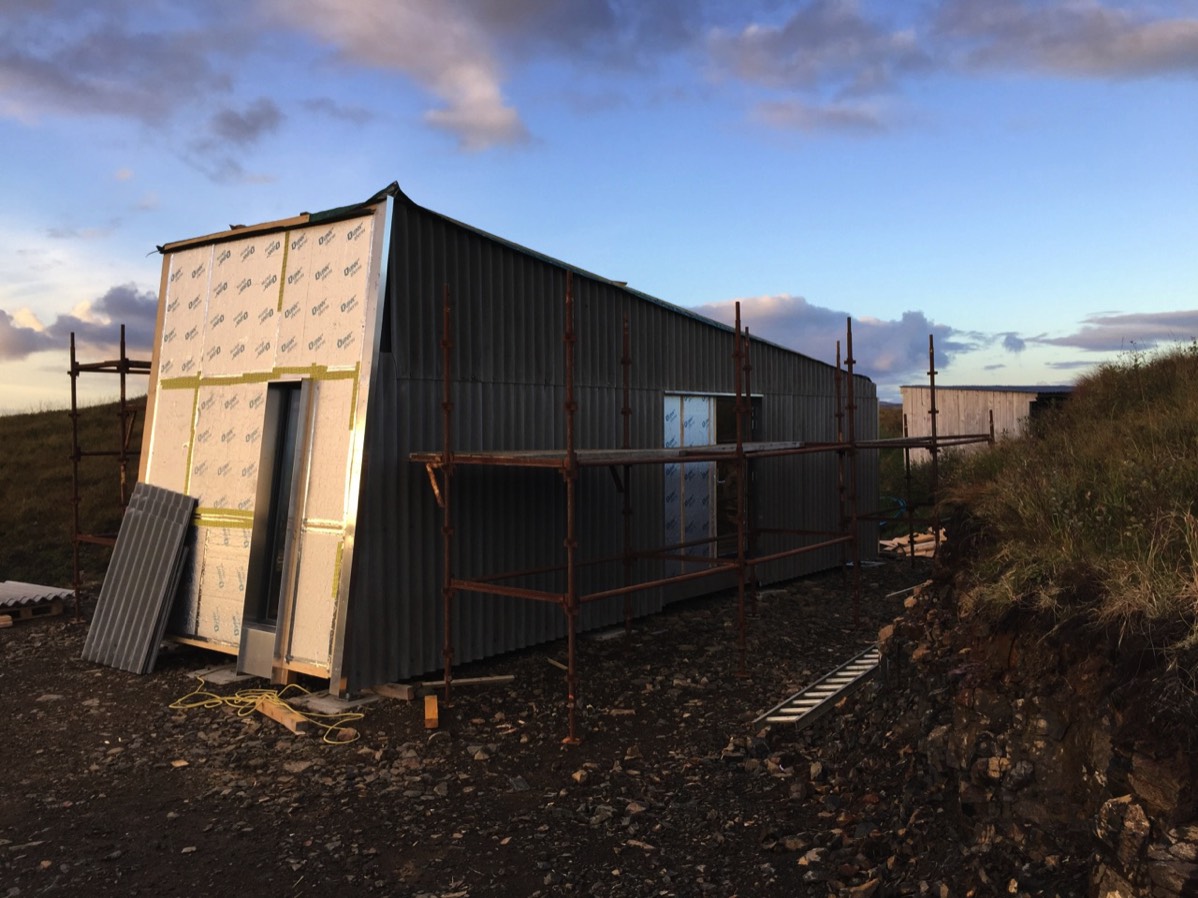
-
22/10/2015 Oct 22nd -23rd
Battle with the weather
Unfortunately upon my return from work the weather had become quite blustery and wet. We made brave attempts and managed to finish the wall cladding in 40mph gusts. Turns building into a cruel comedy and saps your energy. Simple tasks taking three times as long. We gave up on Thursday evening and decided to do the roof and roof flashings in the next weather window.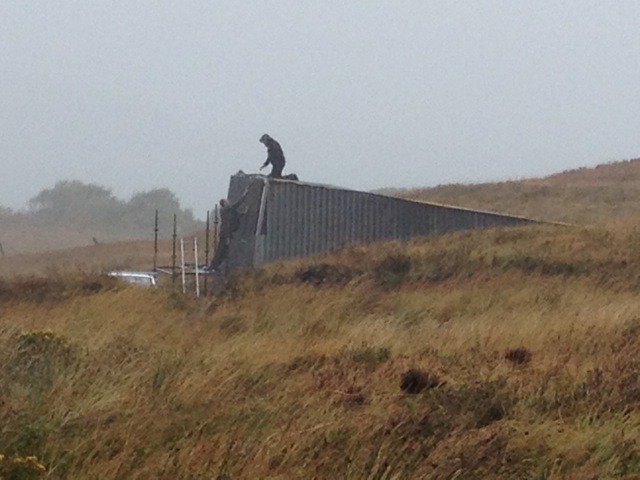
-
26/10/2015 Oct 26th - 27th
Weather Window
On Monday the weather was better than the forecast had said, still 30mph gusts, but sunny. Simon changed plans so that we could do roof sheets. It has to be dry as the overlaps of the Marley have to be sealed with butyl strips. In the West Highlands, because of the force of wind this has to be doubled up on the overlaps compared to other regions in the UK. The fixings also have to be at shorter intervals to survive the winds here. We made best use of the weather and the roof was completed in one day.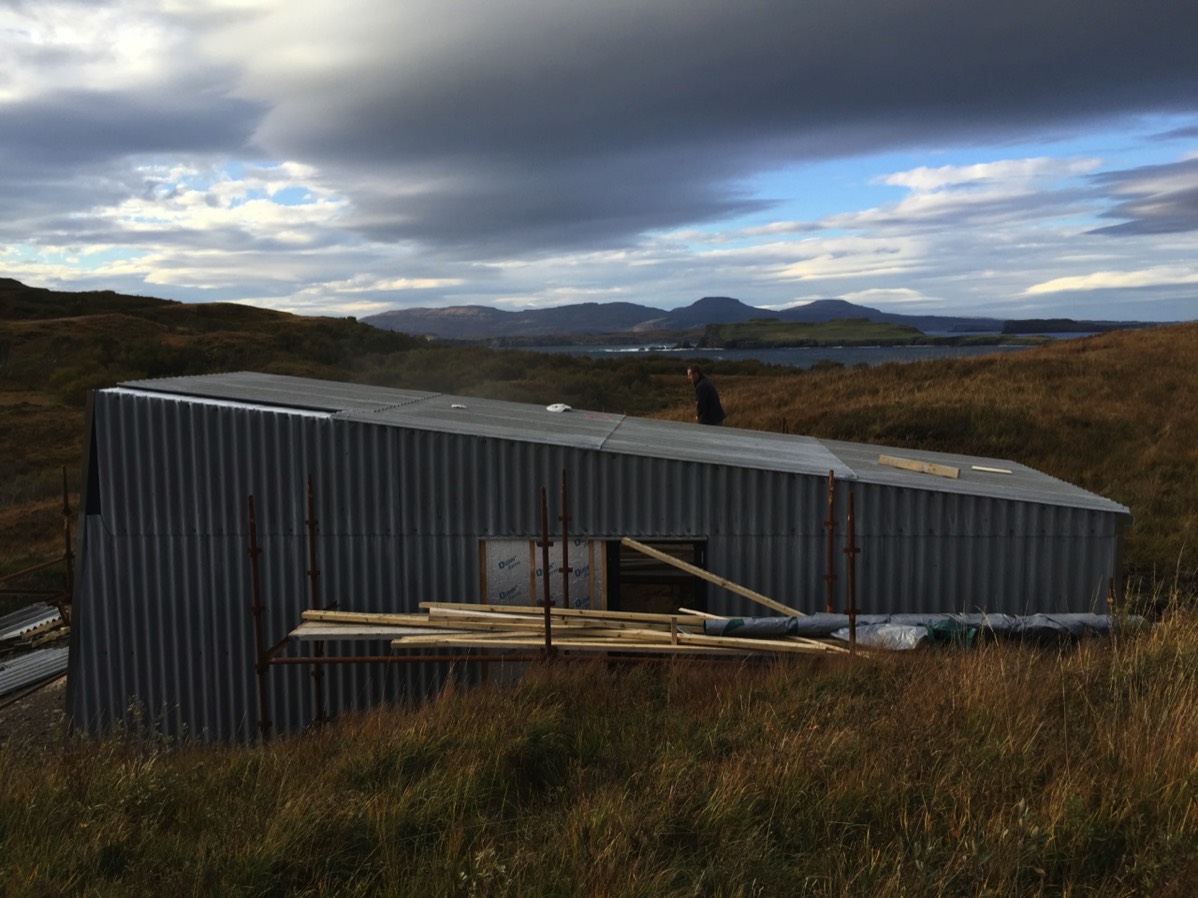
-
27/10/2015 Oct 27th - 29th
Finishing Flashings
With all the Marley installed and screwed down we had Tuesday to complete the flashings. Luckily Tuesday was a lot less windy and a beautiful day, 18c, incredibly warm. It felt great to get all of the flashings completed and looking very sharp without battling with the wind. Simon used the next two days to carefully seal windows, both inside and out. He also put the cross battens on for the Scot Larch inserts. We beat the storms…….just.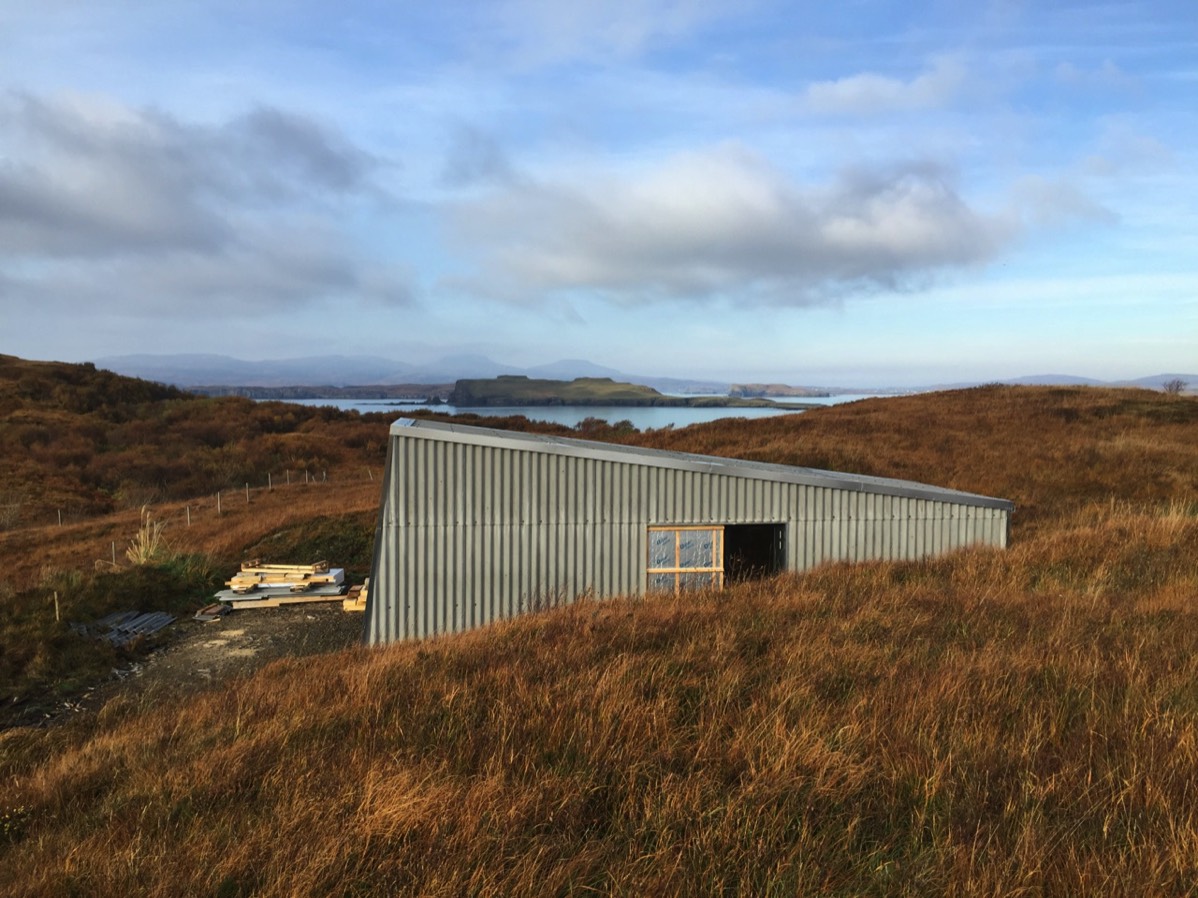
-
02/11/2015 Nov 2nd-5th
Larch Cladding Insulating the inside
The internal insulation is due to be delivered this week. While getting the car serviced in Aird I had organised to pick up the larch cladding from a small sawmill called Cromartie Timber, just outside Strathpeffer. The sawmill owner was very helpful and got my order prepared in less than a week. All the wood is locally sourced and sawn on site. I hadn’t been to such a sawmill since being taken as a very young child by my father to our local one. I am glad they still exist. I saw the larch flooring while there and put in an order for the the studio floor.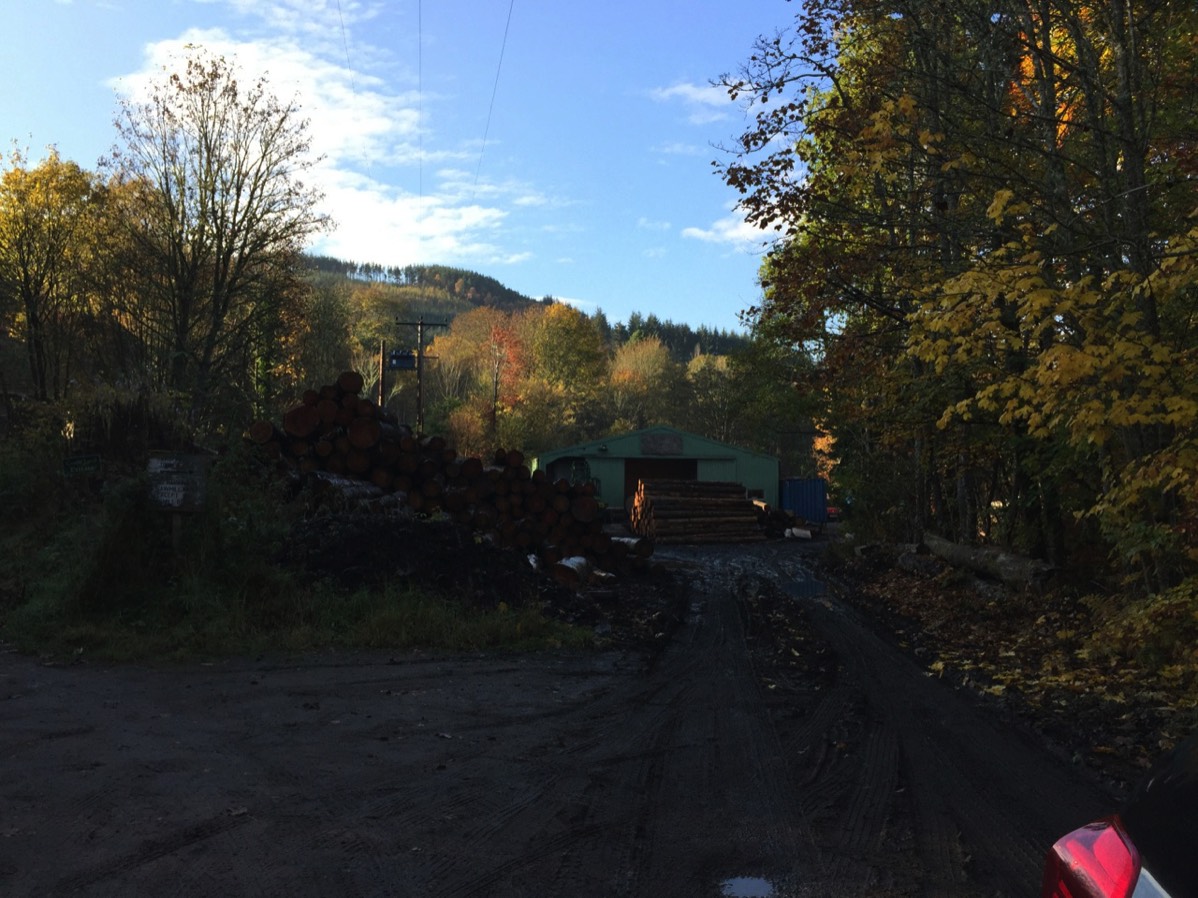
-
06/11/2015 Nov 6th
Internal Insulation Arrives
John from Caley arrived with the internal insulation and the roof battens.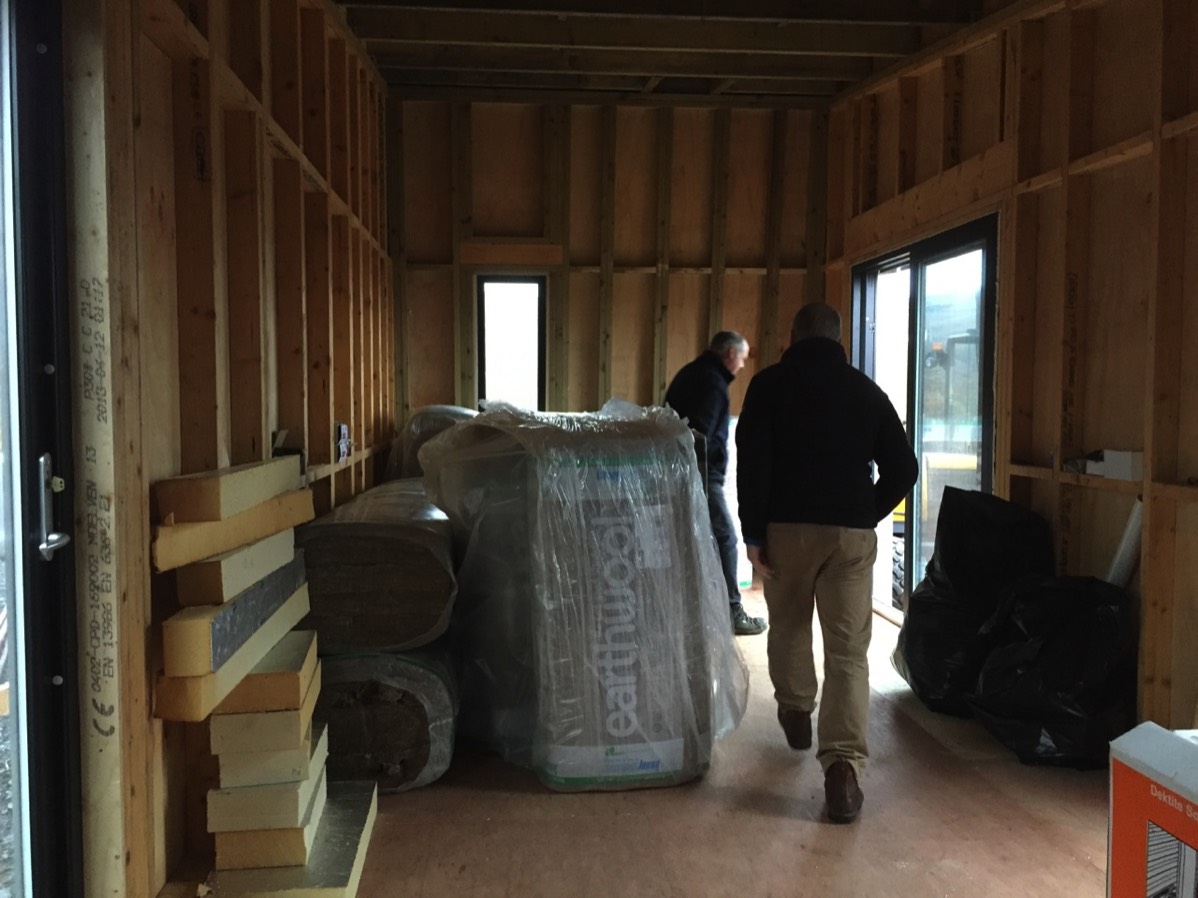
Time to crack on with the inside in time for the electrician to do the first fix. -
09/11/2015 Nov 9th - 27th
Installing the Insulation
I have been a little late putting up posts about the insulation and installing the first fix electrics. I was doing the insulation on my own and it is an itchy and unpleasant job. I started on the roof as 100mm of celotex expanded foam had to be installed before the earth wool, 125mm, was placed on top. Working on your own is much slower and saps your resolve when things don’t go well. It can become a bit of a slog. I had to get all the insulation in and the airtight membrane installed on the inside of the roof before the electrician came to do the first fix on the 25th of November. This was my deadline and motivation.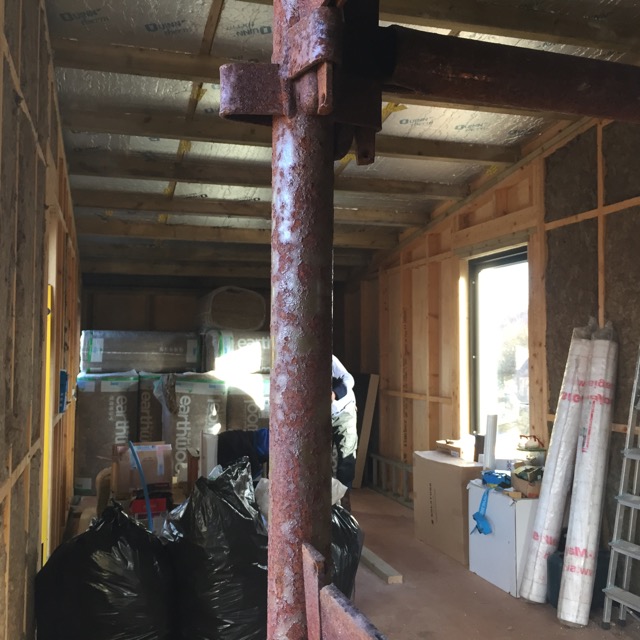
-
16/11/2015 Siga Membranes and Tapes
Airtight Membrane
The airtight membrane we used on our previous house was really good and the tapes designed to use with it are incredibly easy to use and they produce a reliable airtight seal. This is really important as the strength of the storm force winds on Skye test the building and any gaps will allow a lot of air to enter the building making it much less easy to heat and maintain a comfortable internal environment as economically as possible.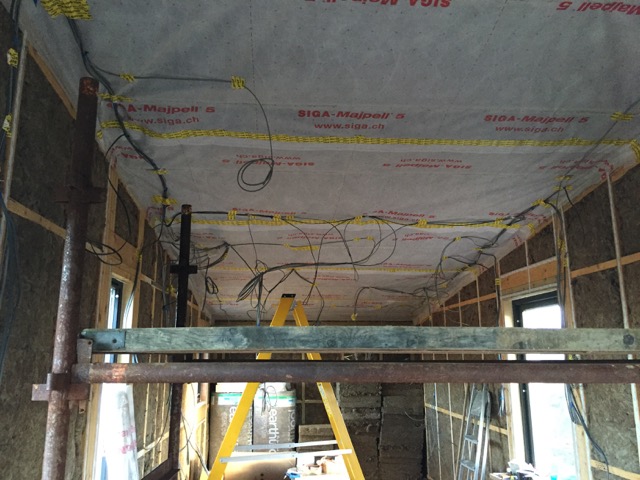
The companies products we use are German/Swiss called Siga. -
27/11/2015 Cables
First Fix Electrics
I managed to get all of the insulation installed and the ceiling membrane on before the due date, 25th of November, for the first fix of the electrics.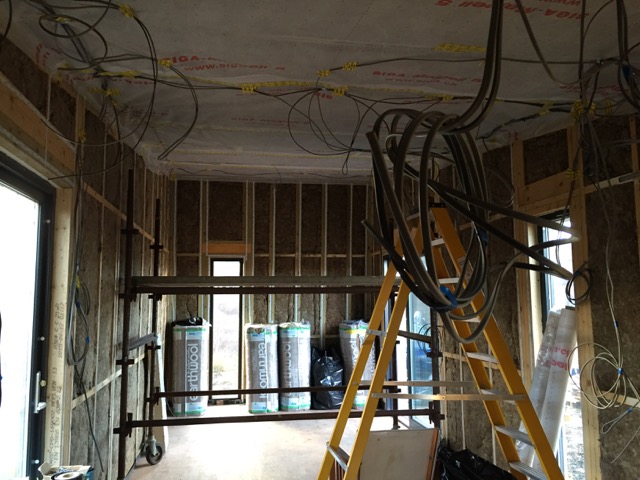
The electrics are fairly straight forward so it only took a day to install all of the wires across the building. -
12/12/2015 Larch
External Larch Cladding
Simon managed to get back before the Christmas break to install the external Larch cladding panels on both sides of the building. Once weathered the Larch will change colour to a silvery gray.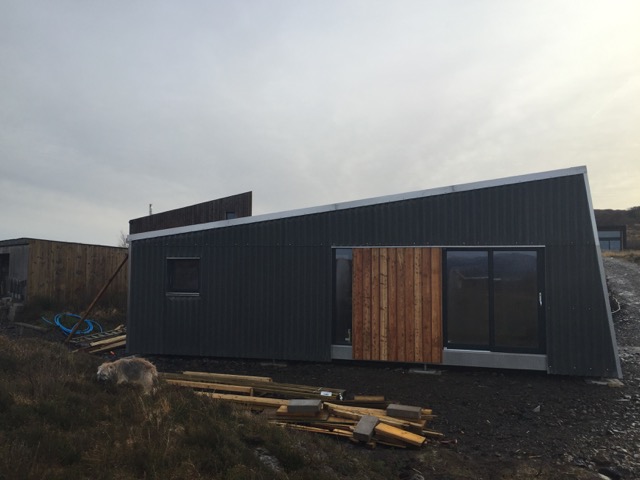
-
06/01/2016 Ceiling
Battens & Ply
As Simon remarked I took my foot off the accelerator over the holiday and let the schedule slip a bit. It had taken me too long to fix the battens to the ceiling. The battens, 25mm were to allow a void between the roof membrane and the ply ceiling for the electrics. So it wasn't until the end of January that the ceiling was complete.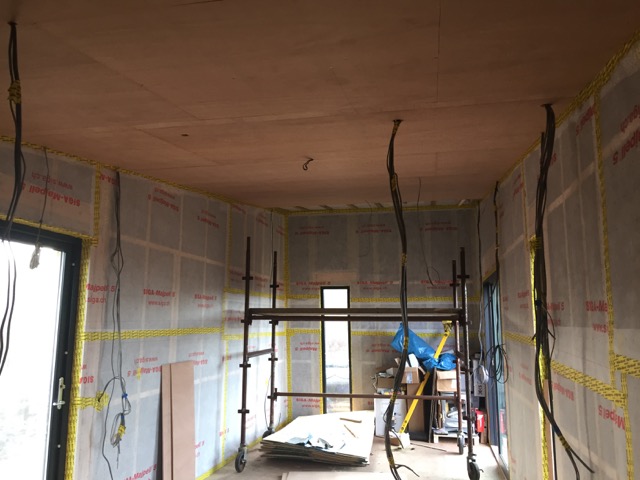
-
05/02/2016 Studs
Internal Stud Walls
The Ceiling together with the electrics threaded through in the correct places had to be complete before we could begin to put up the internal stud walls for bathroom, hall and kitchen.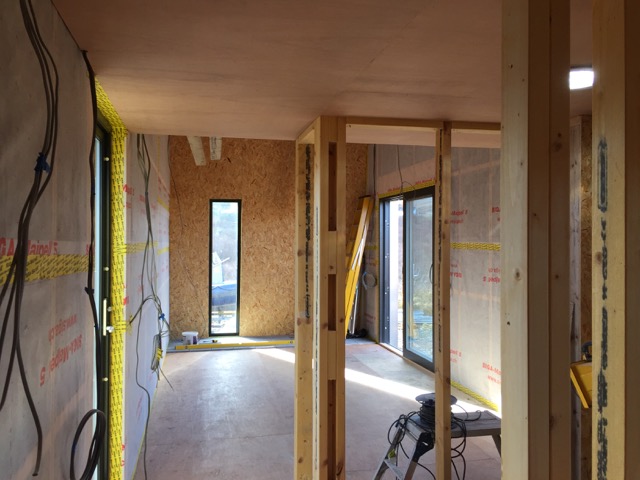
As these were quite complex I needed Simon to set them out. This happened in the first two weeks of February. -
14/02/2016 Holes in Roof
Chimney & Light Tube
Simon had other jobs he needed to fit in so had asked me to put the holes in the roof for the chimney and the light tube in the bathroom.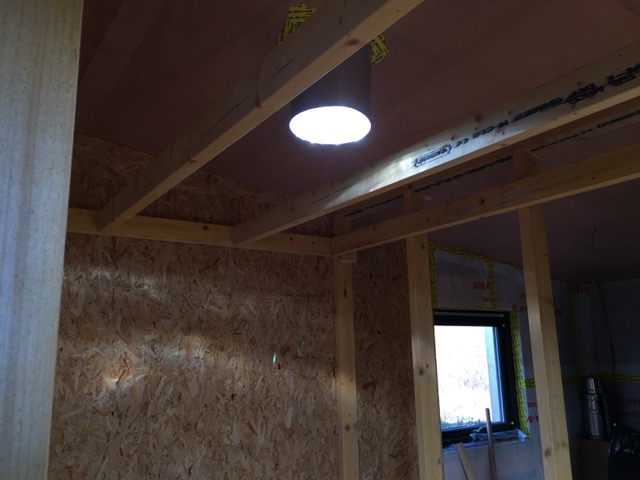
I said I would but was nervous about the process. I had to make sure I was putting them in the correct place then carefully drill through the roof and make the correct size hole for the flashings to fit and be watertight. -
23/02/2016 Studs Done
Wall studs complete
Wall studs were complete and had to be so the floor could be laid. Only once floor was laid could the wall sheathing be done internally.
-
24/02/2016 Larch Floor
Laying Floor & Tiles for Stove
I had to lay the floor as Simon was busy on another job. I had to do it quickly to allow Simon enough time to fit in doing the internal wall sheathing. Time was getting tight.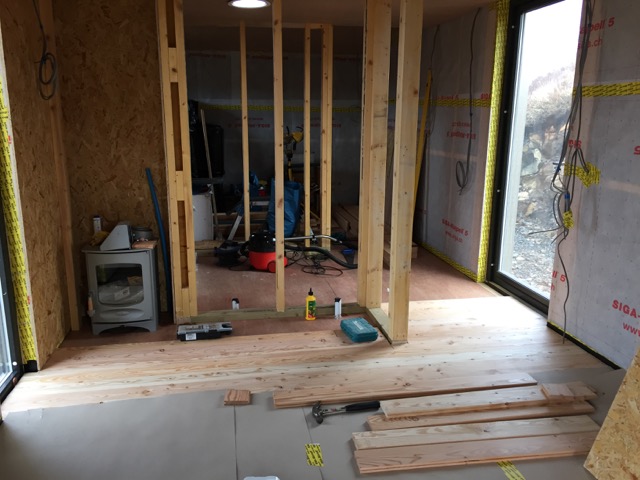
I had ordered foam wood floor underlay and had to sort wood and cut it to length with required expansion gaps. -
06/03/2016 Osb
Internal Sheathing
We were using Osb on the side walls and the end wall in the bedroom. Simon was able to come back on the 6th of March, I completed and covered floor ready for him, just. The Osb went on quickly and well. We had completed it in a couple of days.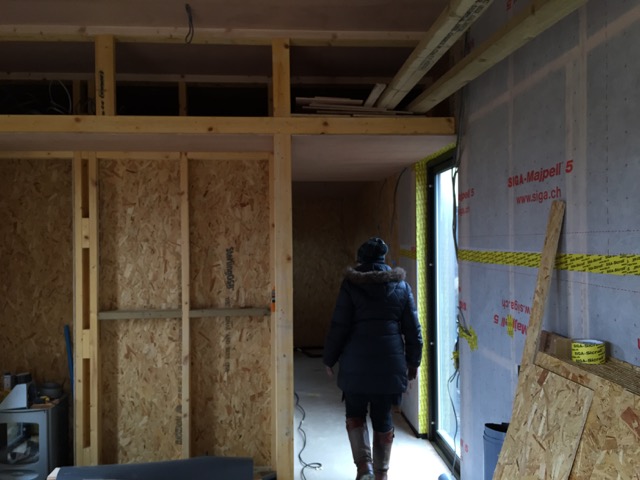
-
09/03/2016 Sliding Door
Pocket Door
I was having to keep on top of the ordering of parts, like the pocket door, and the door catches etc. Kate was sealing floor as work was completed for bathroom studs. We also were having to order and collect all internal fittings, lights, kitchen, sinks, taps, plumbing.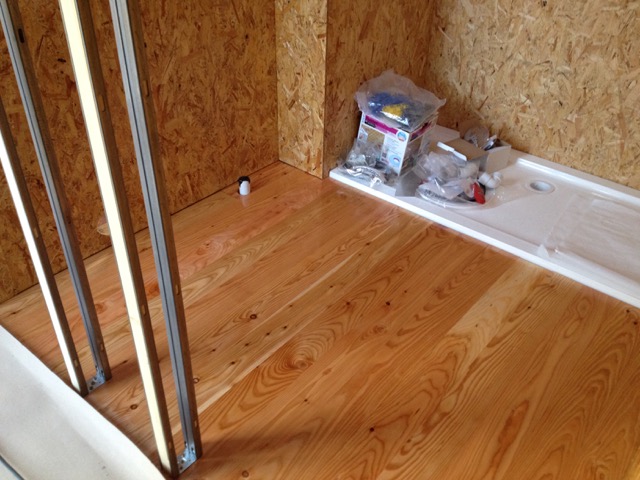
-
27/03/2016 End Wall
Cembrit Wall behind Fire
To save time and money we were picking up much of the internal fittings. The cembrit cement wall panels and kitchen we picked up from Glasgow in third week of May.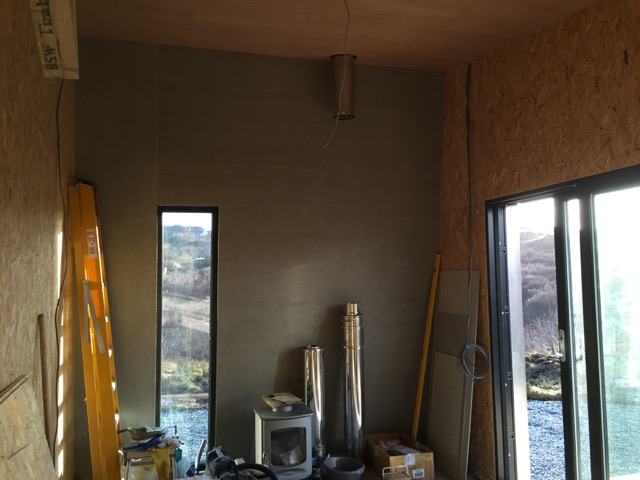
We also had to tie in with second fix electrics going in after I had completed plumbing. -
04/04/2016 Electrics Ground Works
Running out of time
I also had to get Sean back to finish trench for water connection and electric connection before 2nd fix. As I was tied up I got someone else in to do the external decking. Once this and all trenching and final gravel was in place I felt much happier. I also installed the flue for stove and fitted stove.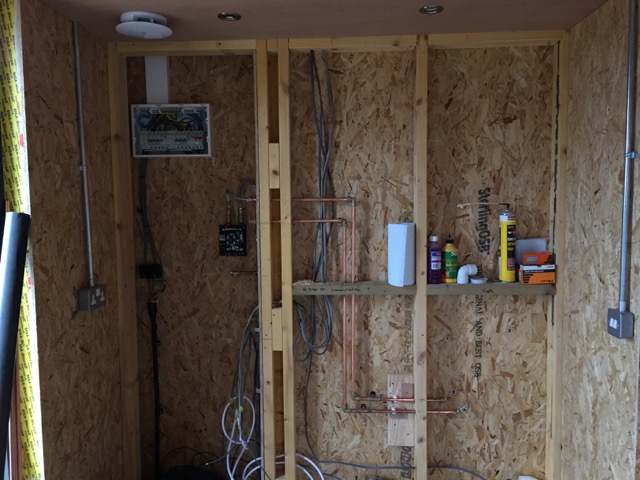
-
07/04/2016 Plumbing
Sinks, Hot water, soldering etc
I was doing the plumbing. I had promised it would all be complete so the electrician could get on with the second fix. I had to install the hot water heater and shower with plumbing intact so the electrician could wire them up.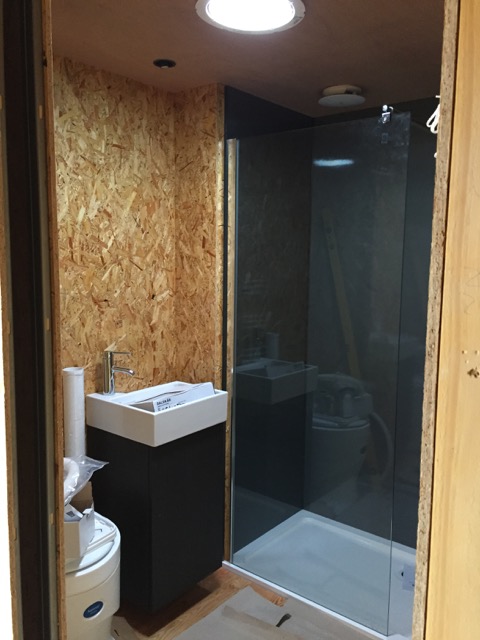
-
09/04/2016 EEK
Two Weeks!
Kate had done a brilliant job of finding and getting all furnishings in place and delivered ready for the final push. Mathew the electrician was doing a great job with the galvanised conduit. He would be complete and ready to test in a couple of days.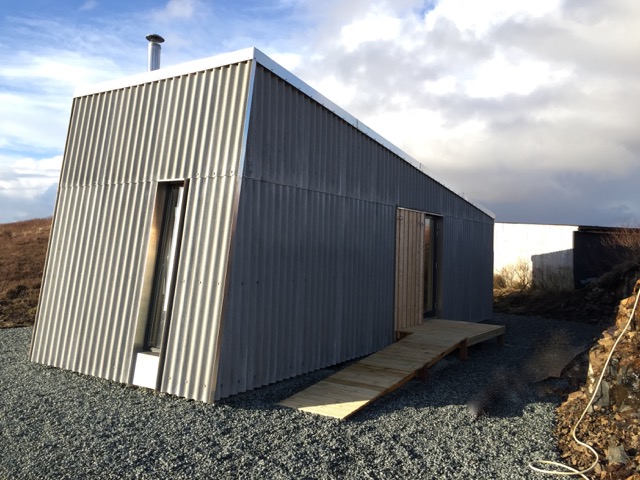
-
17/04/2016 We have light
Light, plumbing, hot water
By the 17th of April we have light, tested and cleared, shower and hot water working, sinks, loo and plumbing all complete and functioning. Kitchen almost complete and installed.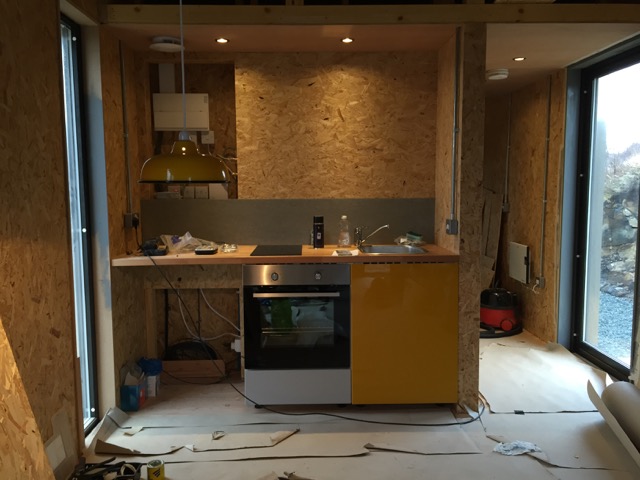
-
18/04/2016 Cabin Bed
Making Bed
Simon, as he was really busy, had challenged me to make the cabin bed base and frame and he would help me complete the ply finish.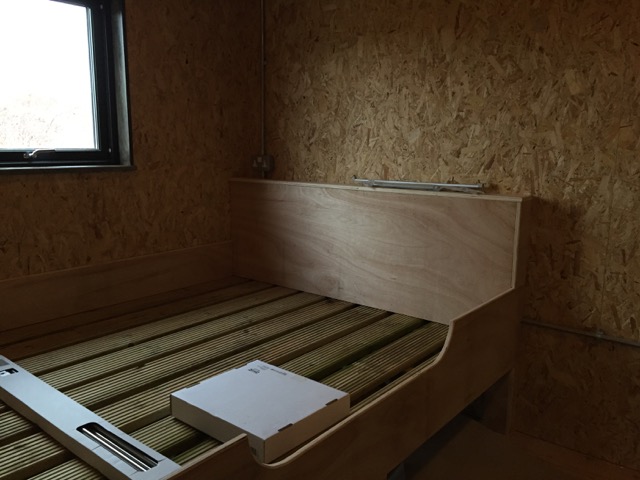
-
21/04/2016 Finishes
Light Fittings, shelves, splash backs etc
There were now a hundred and one small, but vital finishing jobs with light fittings, shelves, kitchen fittings, coat hooks, vanity cabinets to complete. I had to be away for a week of work. Which left four days on my return before first guests.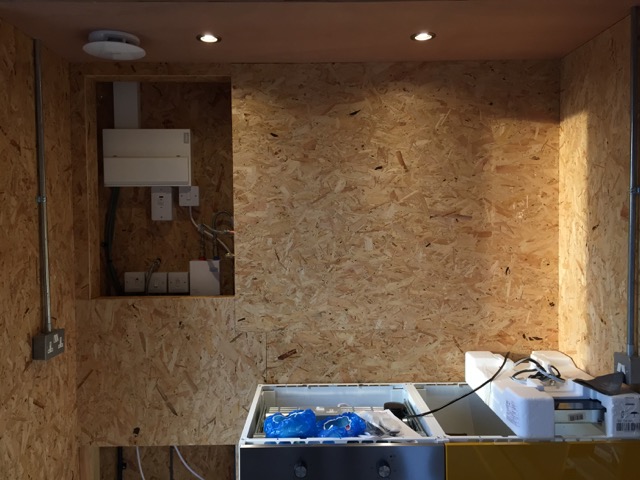
-
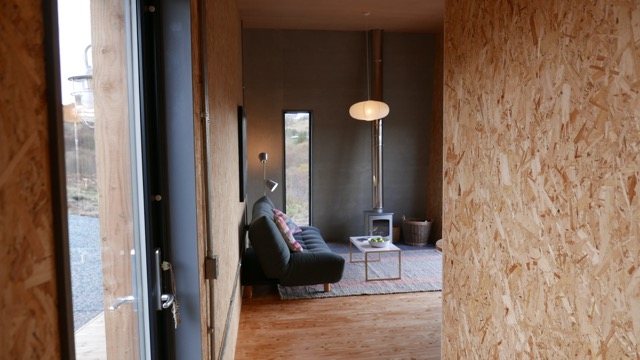
28/04/2016 Sealing Floor
Hard Wax floor finish
Floor finish had to be complete and dry before final furniture and setting up could be done. All was dry day before guests due. Simon, very sweetly came and gave us a hand to set up and me to debug wifi. What a team.