October 2015
Scaffold Down
30/10/15 18:35 Filed in: Scaffold Down | Costs to Wind and Watertight
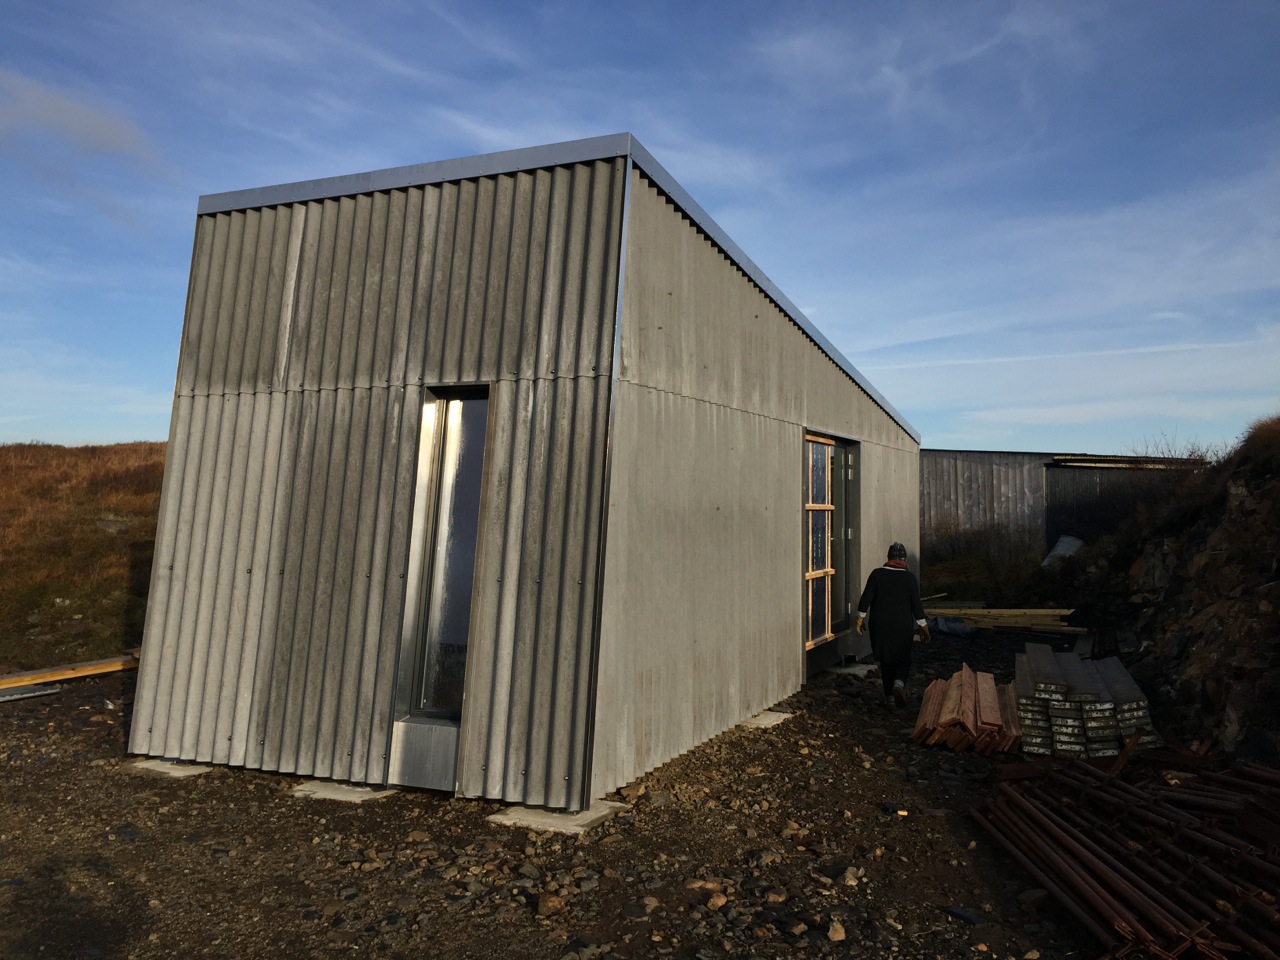
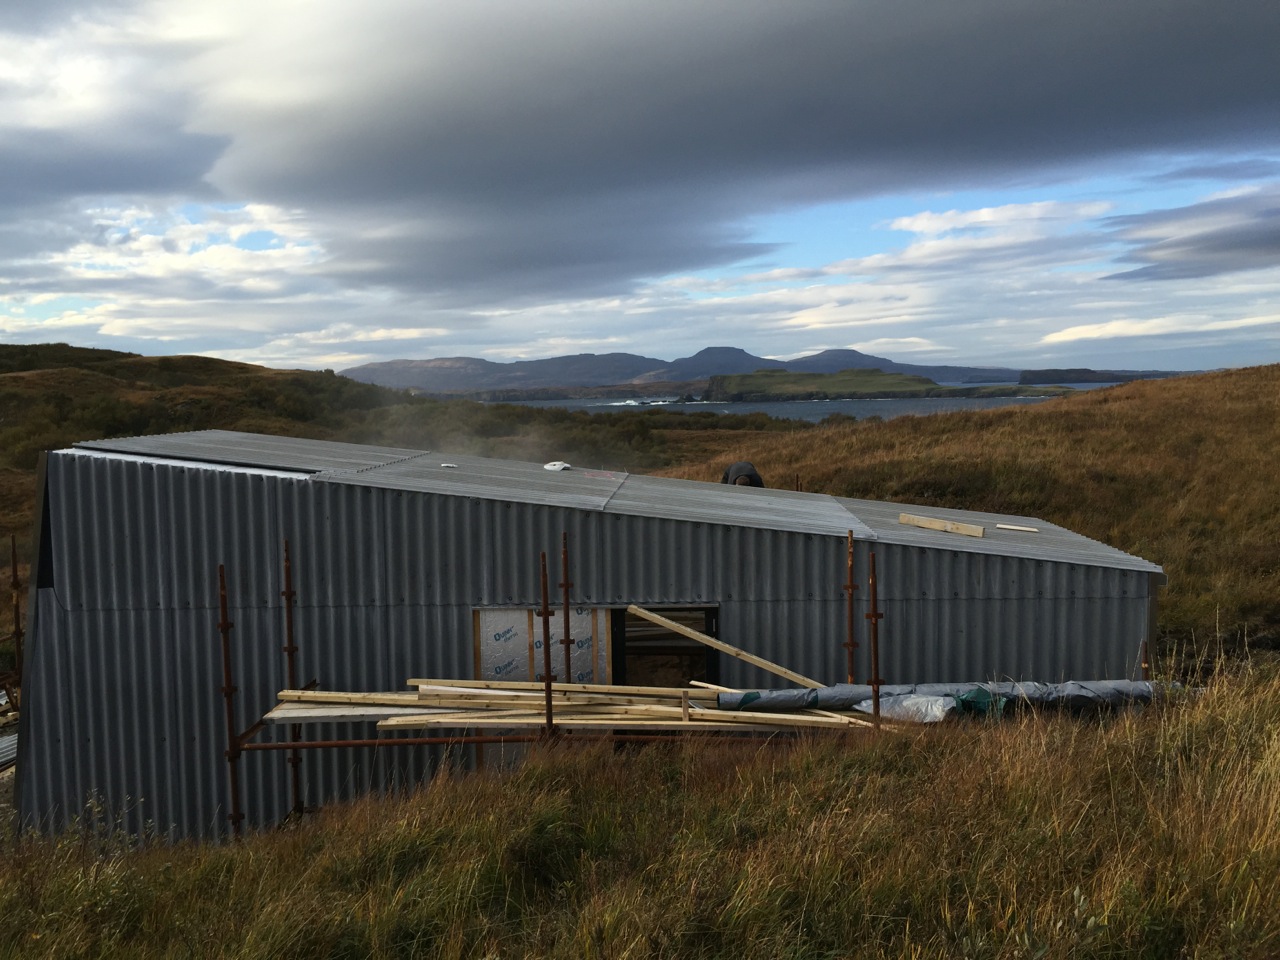
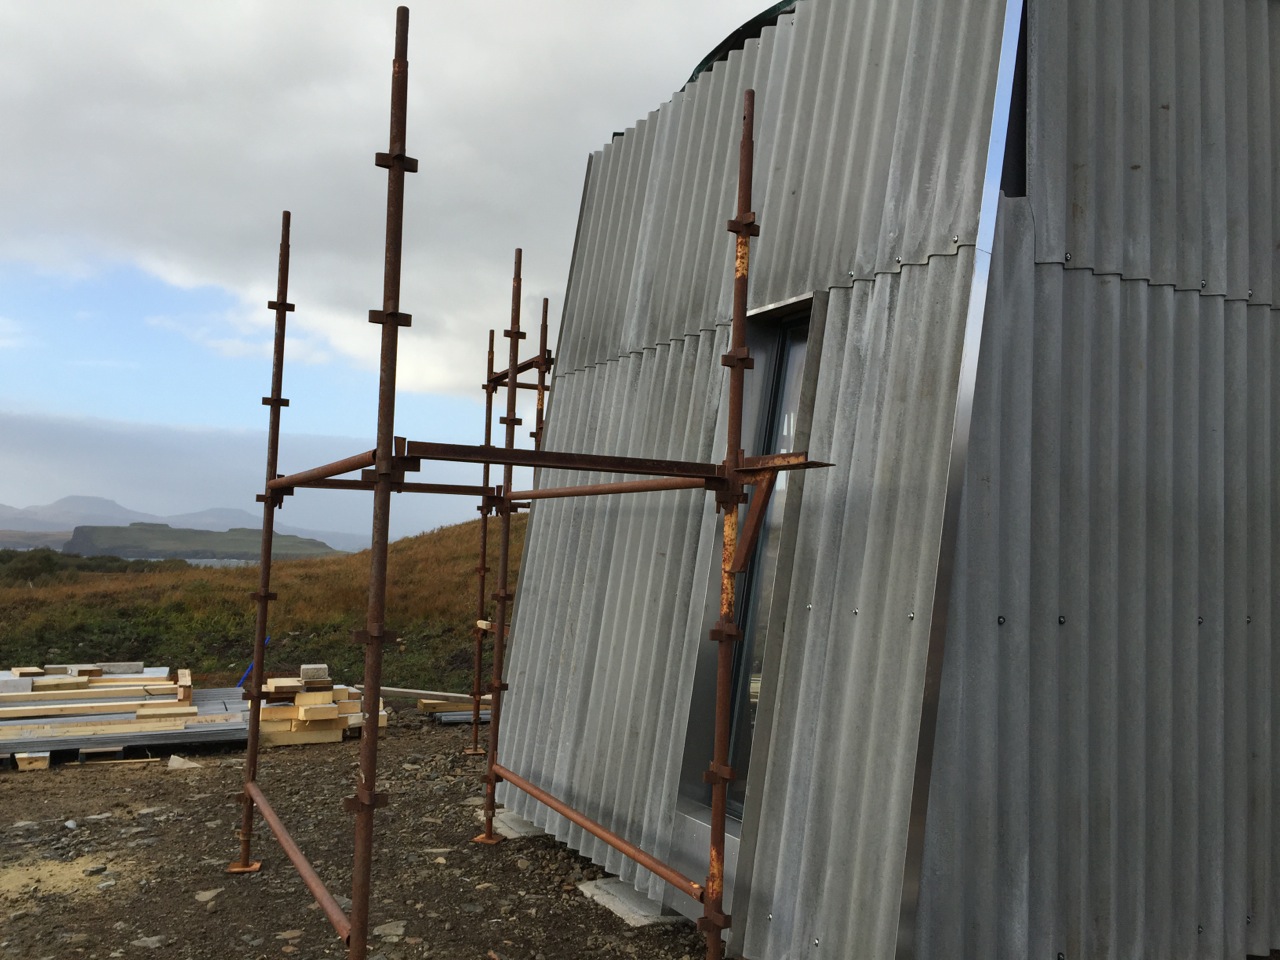
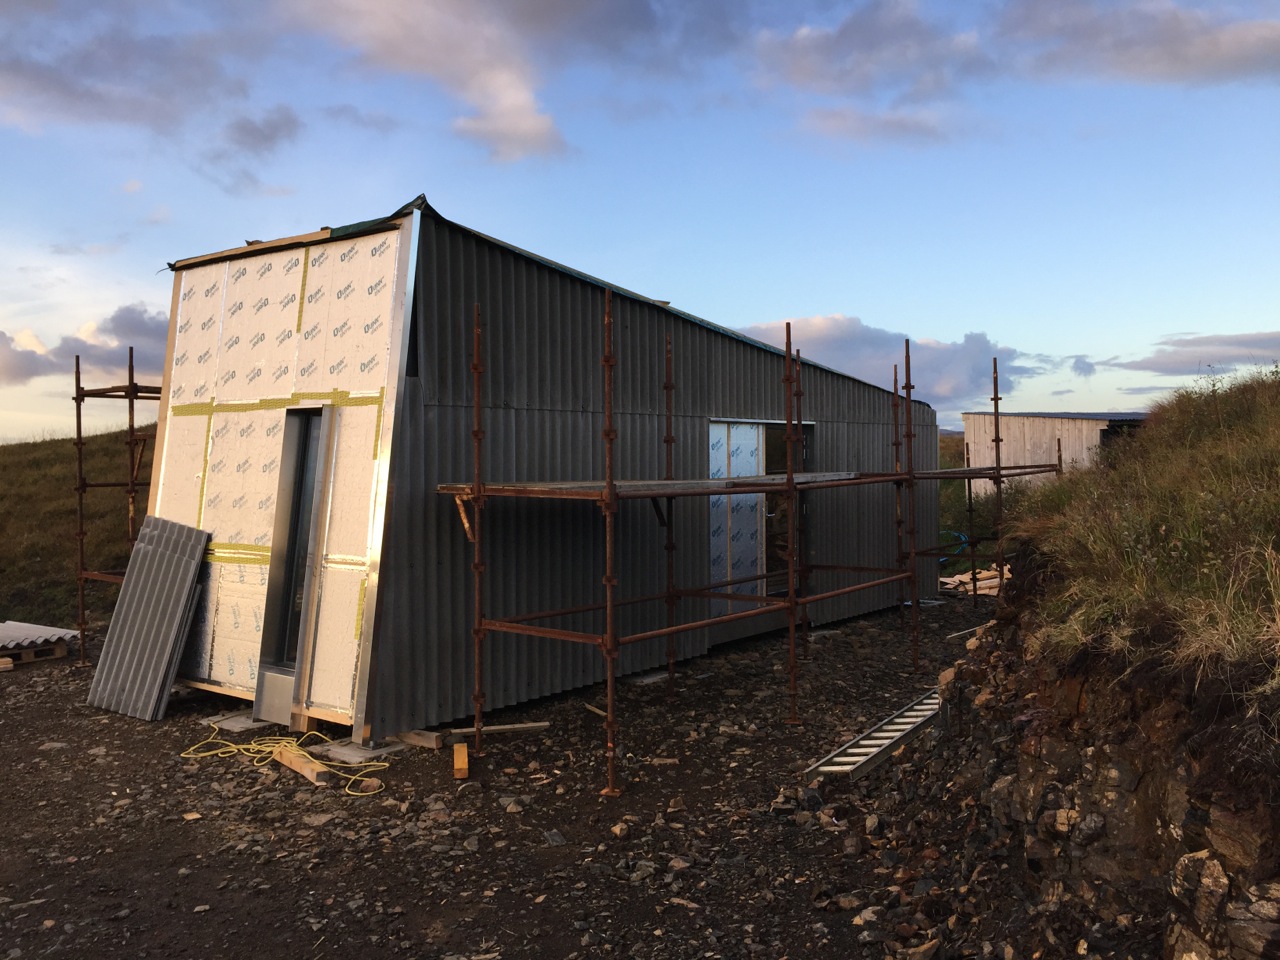
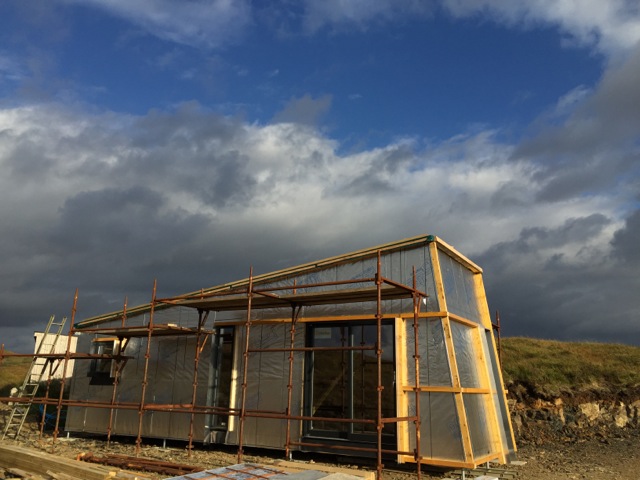
It is a bit of a landmark in the build when you are able to take the scaffold down from around the building. For the first time you get an un-interrupted view of the building in the landscape.
We were all pretty pleased with how it was looking.
Costs to wind and watertight:
Total £15,501
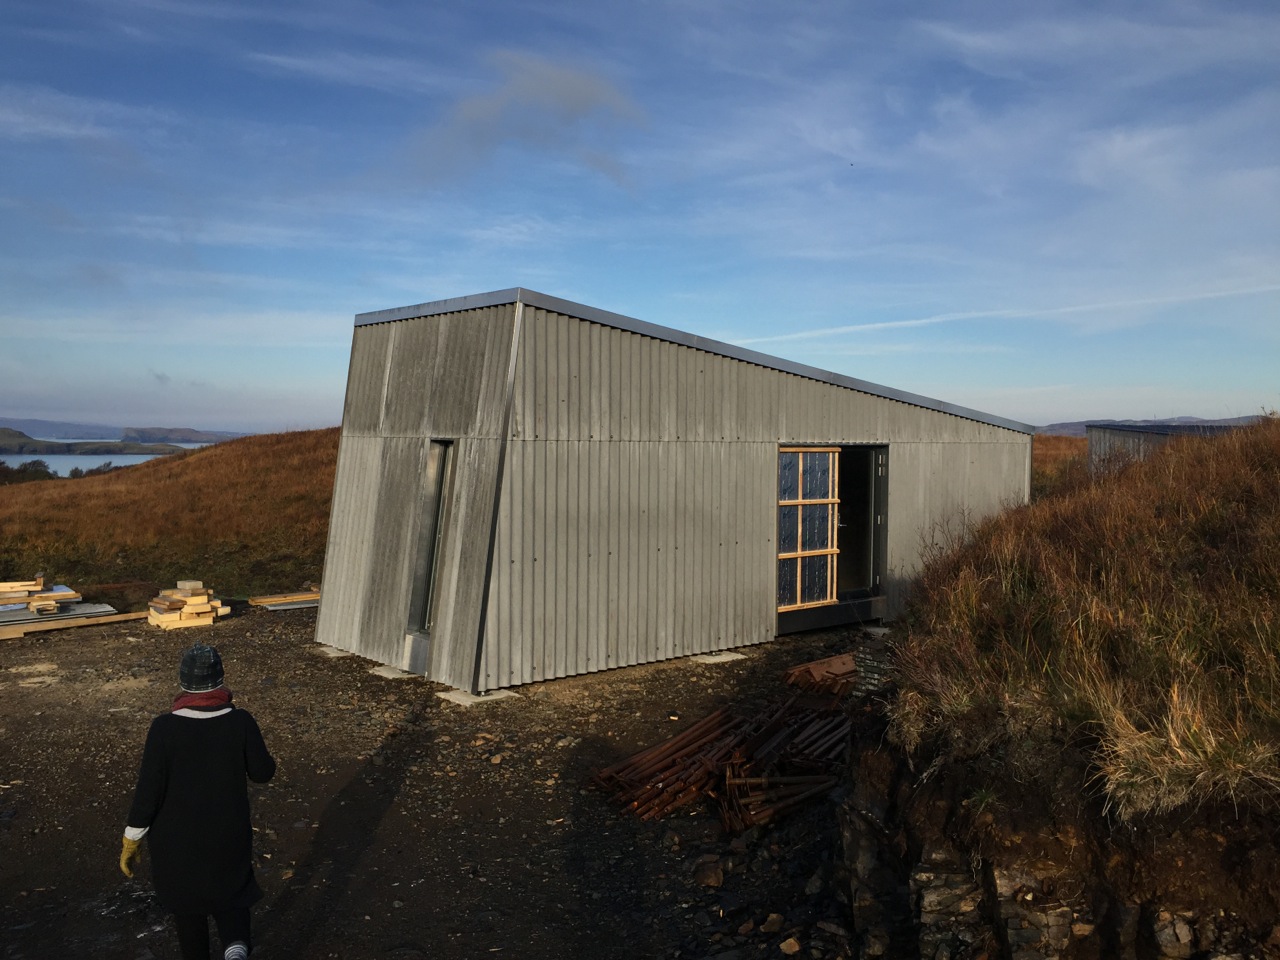
The Marley cladding changes colour depending on the weather conditions in the sunshine it drys very quickly and goes a very light grey. In the wet it goes a battleship grey.
We were all pretty pleased with how it was looking.
Costs to wind and watertight:
- Engineered Wooden Rails £390
- Structural C16 Wood for joists and framing £1540
- Ply Sheathing £280
- Joist Hangers £65
- Roof Timbers £250
- Ply for Roof £270
- Marley Eternity Profile 6 Grey for walls and Roof together with fixings £1270
- Flashings in Aluminium for roof and wall joints, guttering £1350 Neptune Glasgow
- Flashings for Chimney and Light tube, Dektite £78
- Sola Tube £240
- Flue complete £580
- Larch Cladding £278
- Windows Norman Double Glazed £4350
- External Insulation 100mm Dense Foam Celotex £830
- External Membranes to walls and roof with fixings £340
- Labour £3400
Total £15,501
The Marley cladding changes colour depending on the weather conditions in the sunshine it drys very quickly and goes a very light grey. In the wet it goes a battleship grey.
Weather Window
26/10/15 18:22 Filed in: Clear skies
I told Simon that I was going to use Monday to tidy things up on site and prepare as much as I could to have a clear days work on the roof on Tuesday. Come Monday the weather looked as though it was going to be kind for the next two days.
Simon changed his plans and we went for the completion to wind and watertight over Monday and Tuesday.
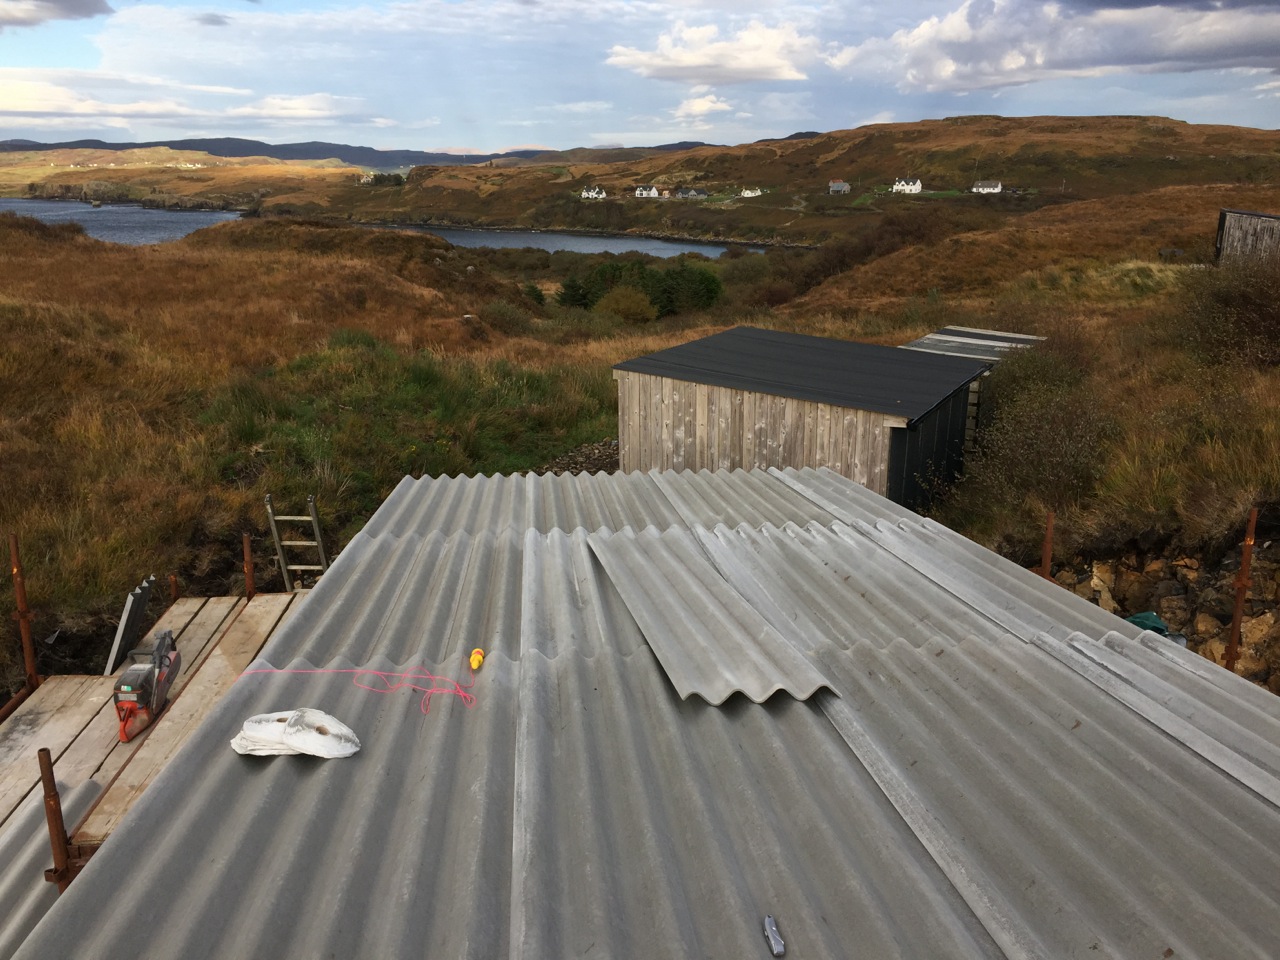
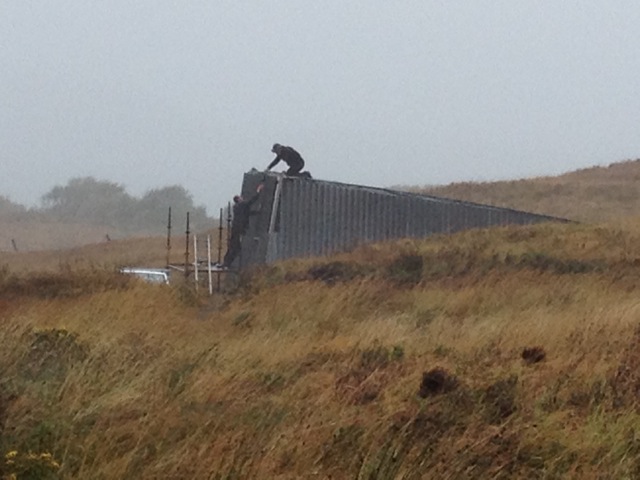
Monday morning was very bright and sunny but still gusting to 30mph. This made getting all the Marley sheets up on to the roof slightly challenging. We did this very quickly being careful how we handled the sheets in relation to the direction of the gusts. Once on the roof we worked out the best set out and put up a string line to make sure all was straight and true.
Once this prep was done we cracked on.
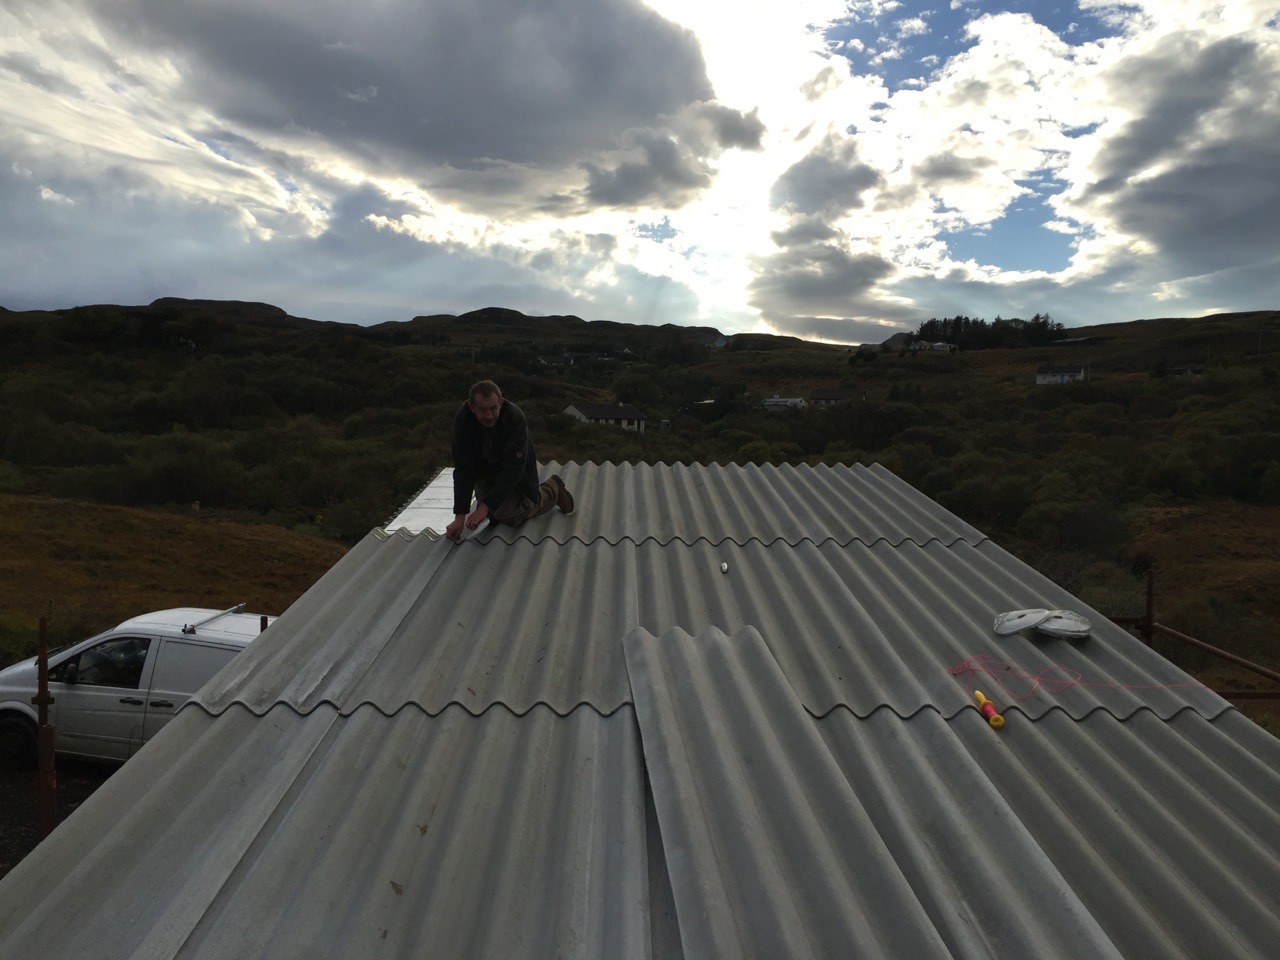
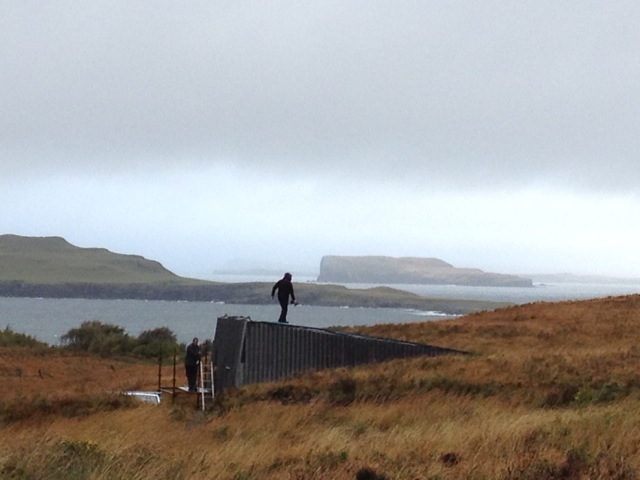
The weather was kind the sheets were dry so the sealing butyl strip went on and worked without an issue. It is very difficult to apply if the atmosphere is damp. By 3pm we had the roof in place and all secured according to Marley's instructions. The installation is slightly different in the Western Highlands as the wind can be very severe. With these conditions you have to install double laps of butyl strips where the sheets overlap to prevent water being blown up the boards. The fixings have also to be at shorter intervals to prevent excessive wind loads and strain on the sheets. We have it on the Blackhouse and has proved to be very tough.
It was a real relief to get this work done. The building suddenly felt ready for the weather, tough and not fragile.
Simon changed his plans and we went for the completion to wind and watertight over Monday and Tuesday.
Monday morning was very bright and sunny but still gusting to 30mph. This made getting all the Marley sheets up on to the roof slightly challenging. We did this very quickly being careful how we handled the sheets in relation to the direction of the gusts. Once on the roof we worked out the best set out and put up a string line to make sure all was straight and true.
Once this prep was done we cracked on.
The weather was kind the sheets were dry so the sealing butyl strip went on and worked without an issue. It is very difficult to apply if the atmosphere is damp. By 3pm we had the roof in place and all secured according to Marley's instructions. The installation is slightly different in the Western Highlands as the wind can be very severe. With these conditions you have to install double laps of butyl strips where the sheets overlap to prevent water being blown up the boards. The fixings have also to be at shorter intervals to prevent excessive wind loads and strain on the sheets. We have it on the Blackhouse and has proved to be very tough.
It was a real relief to get this work done. The building suddenly felt ready for the weather, tough and not fragile.
Finishing the Walls
22/10/15 18:14 Filed in: Wall Finishing
The week after I returned was not looking great we had the first mild storm going across. It was windier and wetter than the rest of the Autumn we struggled on through the 40mph gusts. Working in this type of weather is no fun. Normally easy tasks become increasingly difficult. Accuracy suffers and tiredness quickly takes over.
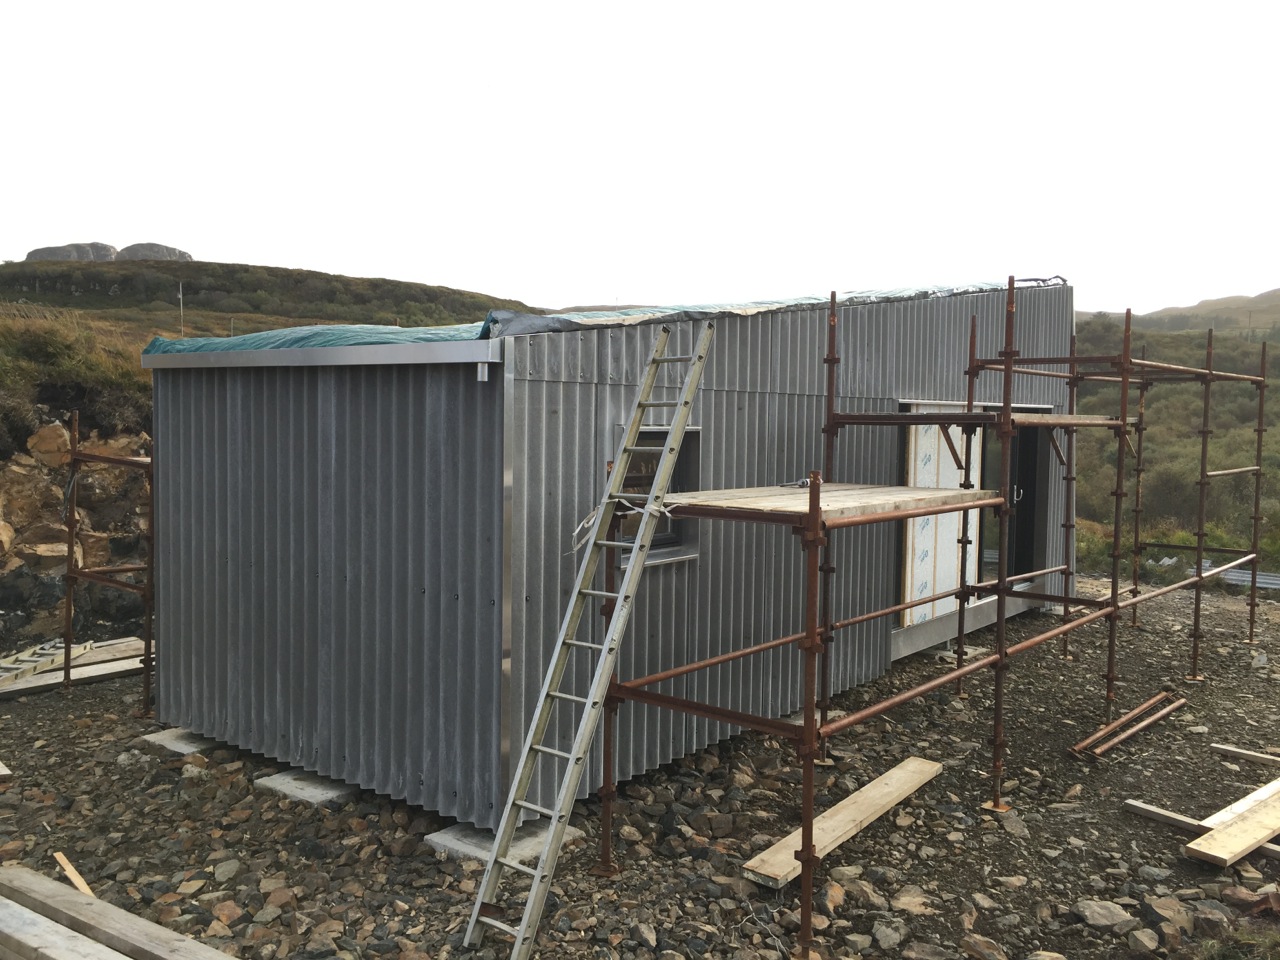
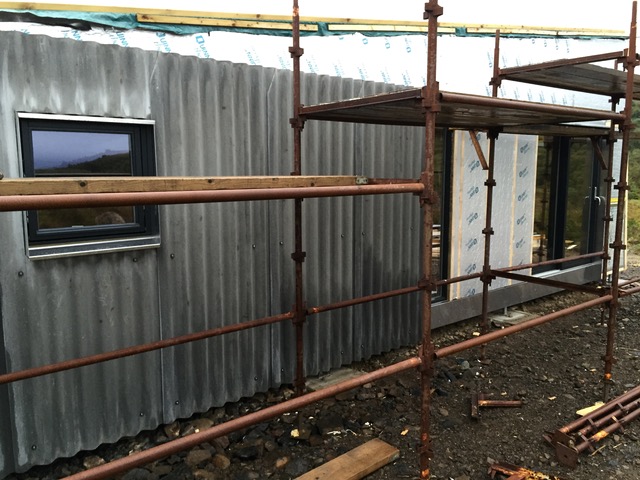
We managed to get the front of the building covered in the Marley and all looking good. We gave up on Thursday afternoon as the conditions were getting too difficult to continue. We decided to wait for another weather window. The following week was not looking too hot either. We said we would keep an eye out for the weather but had pencilled in Tuesday as a possible day to get all of the roof sheets on and properly attached. We needed a dry day for this.
We managed to get the front of the building covered in the Marley and all looking good. We gave up on Thursday afternoon as the conditions were getting too difficult to continue. We decided to wait for another weather window. The following week was not looking too hot either. We said we would keep an eye out for the weather but had pencilled in Tuesday as a possible day to get all of the roof sheets on and properly attached. We needed a dry day for this.
Beating the storms
12/10/15 18:04 Filed in: Marley Eternit | External finishing
The Autumn in Skye has been really good, lots of sun, little wind and very little rain. When starting the build I had in mind that it would be ideal to get to wind and watertight by the end of October.
With my oversight on the three week extra wait for the windows I wasn't sure that we would make it. Simon also had other jobs to go to while the weather remains good enough for external work.
The week beginning the 12th of October was due to be good weather. it was a pain that I had to go South for work on Wednesday as a concentrated few days would get us to wind and watertight. The lifting of the Marley Eternity sheets needs two people they are too heavy to handle and place and cut accurately by one person.
Before I left for work we managed to get the two long walls covered as well as the rear of the building that also required us to install the rear gutter that would go under the roofing sheets. This left the front of the building the roof and all of the roof flashings.
All Prep Complete
By the end of the 8th of October all of the insulation had been cut and carefully fitted, avoiding gaps, taped, and sealed against the weather. The buildings skeleton is no longer visible and the building has become podgy with the addition of the insulations thick coat. The flashings have all been fitted.
Unfortunately we had one wrong size, too short, flashing for one of the front sloping wall corners. This means that we have to get another flashing piece from Neptune in Glasgow to complete this corner. They have already told me that it can be ready when I am next passing on the 16th of October, so not too long a wait.
This doesn't stop us getting on with the rest of the flashings around the building in preparation for the installation of the Marley sheathing. We should begin this from the rear of the building on Thursday or Friday 9th of October. We will see how far we get with this by the end of Friday. I will update with pictures.
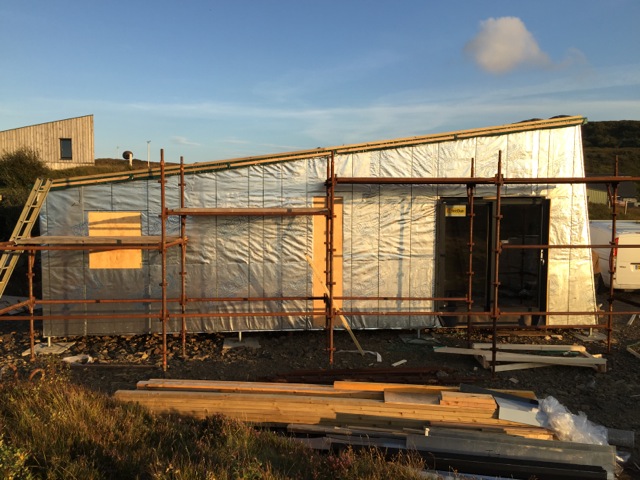
As can be seen below we started on the sheathing of the lower wall panels after lunch on Friday we managed to measure and set out and then cut and place five sheets on the north side and two sheets on the east side. We will crack on first thing Monday 12th October. I am off to work on Wednesday and will pick up flashings from Neptune Fabrications on my way past Glasgow.
Both of us are keen to get on with getting to wind and watertight as quickly as possible as the winter storms will begin to roll towards us across the Atlantic.
Unfortunately we had one wrong size, too short, flashing for one of the front sloping wall corners. This means that we have to get another flashing piece from Neptune in Glasgow to complete this corner. They have already told me that it can be ready when I am next passing on the 16th of October, so not too long a wait.
This doesn't stop us getting on with the rest of the flashings around the building in preparation for the installation of the Marley sheathing. We should begin this from the rear of the building on Thursday or Friday 9th of October. We will see how far we get with this by the end of Friday. I will update with pictures.
As can be seen below we started on the sheathing of the lower wall panels after lunch on Friday we managed to measure and set out and then cut and place five sheets on the north side and two sheets on the east side. We will crack on first thing Monday 12th October. I am off to work on Wednesday and will pick up flashings from Neptune Fabrications on my way past Glasgow.
Both of us are keen to get on with getting to wind and watertight as quickly as possible as the winter storms will begin to roll towards us across the Atlantic.
External Wall Build Up
05/10/15 20:21 Filed in: Extenal Walls | Flashings
You can see from the photographs how the external wall is built up. Some 95m by 70mm C16 Wooden rails are placed along the frame of the building and will be the fixing points for the external Marley Profile 6 Sheathing. The Sheathing for the whole building came to just over a £1000 including Vat. This doesn't include the Larch inserts around the double door and single door.
The rails also work to organise the line of the cut of the sheathing along the long walls and front sloping wall. Between the rails 100mm rigid foam insulation board is cut and placed and secured. It is taped at the joints to prevent water ingress, as can be seen. This detailing is slow and takes time but will prevent any cold spots and bridging from inside to out.
The external sheathing is then supplemented inside by another 100mm, in the walls, of a high u value slab based insulation. There will be 250mm of this slab insulation in the inside of the roof.
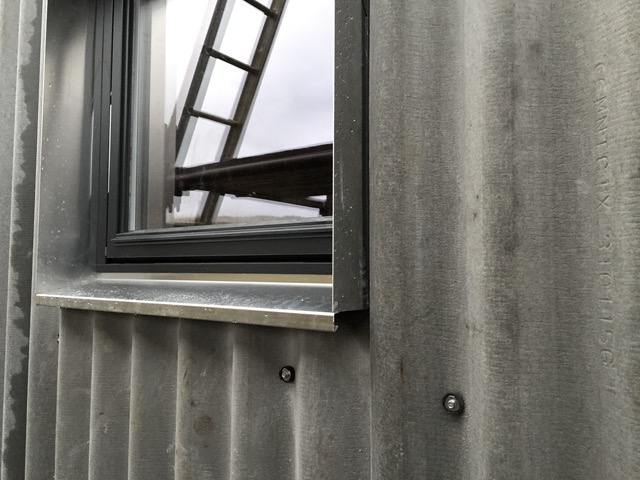
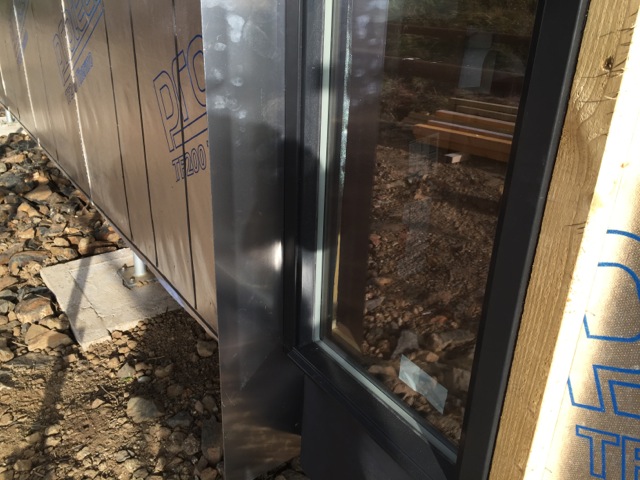
You can also see from the photographs how the milled aluminium flashings work and are fixed around the windows. We have been really pleased with the quality and look of these against the Nordan windows. They help protect and shed water away from the windows. Before we can fit all of the flashings a lot of time was spent by us checking how they would fit on the external wooden rails and frames around the edges of the building.
It is completely worth spending this careful time considering problems as this will allow the sheathing to be installed quickly and as easily as possible. Simon is great as he makes me slow down and consider how each stage needs to be right and any problems talked through before embarking on the next bit of the build. On my own, part from being much slower, I might be tempted to get some sheathing up before all of the other careful, time consuming bits had been completed as I am excited to see how all the materials will look together.
The rails also work to organise the line of the cut of the sheathing along the long walls and front sloping wall. Between the rails 100mm rigid foam insulation board is cut and placed and secured. It is taped at the joints to prevent water ingress, as can be seen. This detailing is slow and takes time but will prevent any cold spots and bridging from inside to out.
The external sheathing is then supplemented inside by another 100mm, in the walls, of a high u value slab based insulation. There will be 250mm of this slab insulation in the inside of the roof.
You can also see from the photographs how the milled aluminium flashings work and are fixed around the windows. We have been really pleased with the quality and look of these against the Nordan windows. They help protect and shed water away from the windows. Before we can fit all of the flashings a lot of time was spent by us checking how they would fit on the external wooden rails and frames around the edges of the building.
It is completely worth spending this careful time considering problems as this will allow the sheathing to be installed quickly and as easily as possible. Simon is great as he makes me slow down and consider how each stage needs to be right and any problems talked through before embarking on the next bit of the build. On my own, part from being much slower, I might be tempted to get some sheathing up before all of the other careful, time consuming bits had been completed as I am excited to see how all the materials will look together.
Windows Secured
Been a bit slow at putting progress up on the blog as Simon has been working me hard since the windows arrived. I have been too physically tired to write anything in the evenings.
After the dramatic progress of the framing and a building structure suddenly appearing the tempo has slowed again. Once the windows arrived from Nordan, earlier than the schedule by a few days, there has been lots of careful work making sure all the components fit together properly to allow the external weather proof sheathing to go on quickly and without modification.
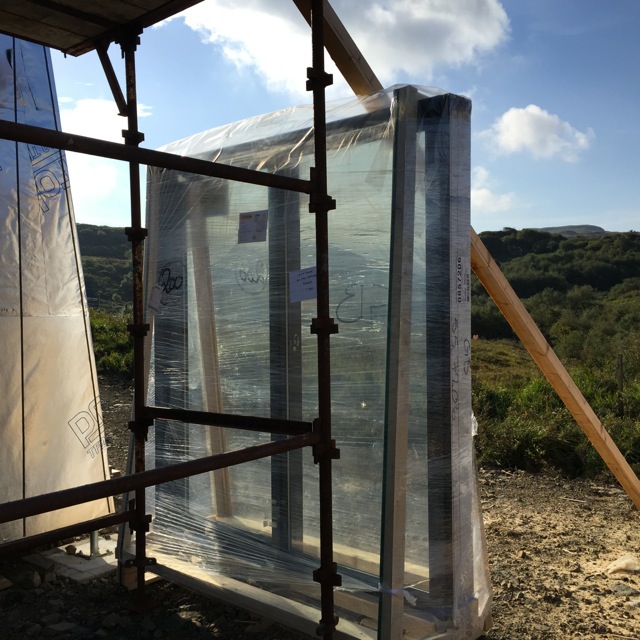
Below are the windows arriving. We paid Caley timber a very reasonable fee of £50 to deliver the windows to our site on Skye. John the driver is great and was very careful bringing the windows off of the lorry and then on the forklift down the track to the site. The windows had been packed very well by Nordan so they arrived in good condition without any dents, scratches etc.
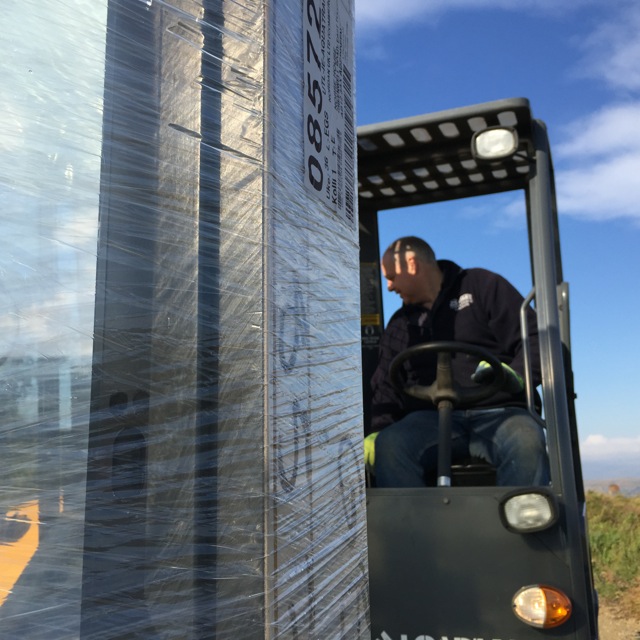
John was able to place the windows very close to the building. As it was just Simon and myself on site this helped a lot as we were able to slide the large double sliding door set into position before releasing it from the packing. Once out of the packing it became clear that the whole thing was quite heavy. It was at the limit of my strength. Simon is stronger than me but we were able together to lift the window on to stage heights until we only had to lift it the final 100mm into the door hole. Once in it was secured temporarily
I had to travel South the next day at around 1pm. This gave me time to help Simon get the other heavy item, a single full glazed external door unit, into place and temporarily secured.
Simon, while I was away was then able to deal with the smaller two long fixed windows and the small square opening bedroom window. Once in Simon offered up the milled Aluminium flashings, from Neptune in Glasgow, and had then to adjust the window positioning so that the flashings worked with the windows as drawn.
After the dramatic progress of the framing and a building structure suddenly appearing the tempo has slowed again. Once the windows arrived from Nordan, earlier than the schedule by a few days, there has been lots of careful work making sure all the components fit together properly to allow the external weather proof sheathing to go on quickly and without modification.
Below are the windows arriving. We paid Caley timber a very reasonable fee of £50 to deliver the windows to our site on Skye. John the driver is great and was very careful bringing the windows off of the lorry and then on the forklift down the track to the site. The windows had been packed very well by Nordan so they arrived in good condition without any dents, scratches etc.
John was able to place the windows very close to the building. As it was just Simon and myself on site this helped a lot as we were able to slide the large double sliding door set into position before releasing it from the packing. Once out of the packing it became clear that the whole thing was quite heavy. It was at the limit of my strength. Simon is stronger than me but we were able together to lift the window on to stage heights until we only had to lift it the final 100mm into the door hole. Once in it was secured temporarily
I had to travel South the next day at around 1pm. This gave me time to help Simon get the other heavy item, a single full glazed external door unit, into place and temporarily secured.
Simon, while I was away was then able to deal with the smaller two long fixed windows and the small square opening bedroom window. Once in Simon offered up the milled Aluminium flashings, from Neptune in Glasgow, and had then to adjust the window positioning so that the flashings worked with the windows as drawn.